Settings for PII retention when you require an automatic data dump
TABLE OF CONTENTS
Overview
Certain states, such as Illinois, Massachusetts, and Nevada, require your ID verification system to purge any collected data after an ID has been scanned and verified.
This guide will assist you in setting up VeriScan Desktop and VeriScan Desktop Online to temporarily store only the minimum data required to verify a scanned ID, then immediately remove it once it is no longer needed.
After an ID has been scanned, the information will disappear after a set number of seconds.
No information will be stored in the application, the online portal, or on the machine's local disk.
In the next sections of this guide, you will learn how to:
- Install or upgrade to VeriScan version 2.135.0
- Delete all previously stored user data (if present).
- Configure VeriScan Desktop and the VeriScan Online portal.
VeriScan Desktop version 2.135.0 or greater is required to enable these features.
VeriScan will only show the scan information for a set amount of time.
The information can be automatically purged after a set amount of time in seconds.
The information will be automatically purged if another ID is scanned before the timeout.
VeriScan will not store any personal data in:
- the local database
- the local images folder
- the system logs
- the raw scan logs
- the unrecognized images folder
- the unrecognized scan logs
VeriScan will not store/show history in the Recent Scan List in the main window.
VeriScan will not store any data in the Profile Manager.
VeriScan will not store scans in the Local History.
VeriScan Online will not store any personal information in the cloud.
VeriScan Online will not show scans in the History module of the VeriScan Online Portal.
Disclaimer
These features were developed with consideration of legislation regarding the collection and storage of personal information during the ID authentication process. While these features can aid your business in complying with these laws, IDScan.net has not worked with the legislative regulators; therefore, IDScan.net makes no guarantees of compliance with any laws and assumes no liability for any violation thereof. While the software is designed to function within the parameters of these regulations, it is the sole responsibility of the end-user to configure and use the software as needed to maintain compliance with the law.
Installing VeriScan
Download the VeriScan 2.135.0 update.
Run SetupVeriScan.exe after it finishes downloading to install the 2.135.0 Update.
DO NOT enable "Install VeriScan as a service" as these features are not available in this configuration.
Upgrading From An Older Version
If you already have VeriScan installed, you will need to delete the old files that may contain customer data.
Listed below are the locations in which VeriScan Desktop store personal information and how to delete it.
You must follow these steps in order to remove any previous scans from before the update.
If you are installing VeriScan for the first time, you can skip ahead to the In The Online Portal section.
Closing Out Of VeriScan
Before launching VeriScan, we should delete all traces of any previously stored data.
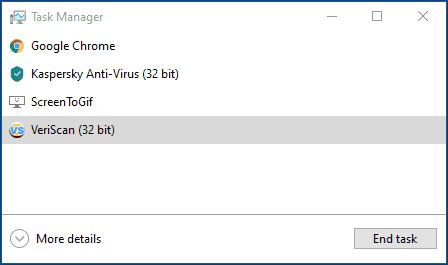
Close VeriScan by pressing the [ × ] button in the title bar.
You can confirm that VeriScan is not running in the background in Task Manager.
If you have difficulty getting VeriScan to close during this process, please submit a support ticket here.
Alternatively, you can email us a support@idscan.net and a ticket will be automatically generated for you.
Deleting Old Files
We recommend using a 3rd-party file shredder tool to delete files directly from the disk. The guide below shows steps for normal file deletion in Windows File Explorer, but you should research secure data deletion tools to find the right tool for your business to help maintain compliance.
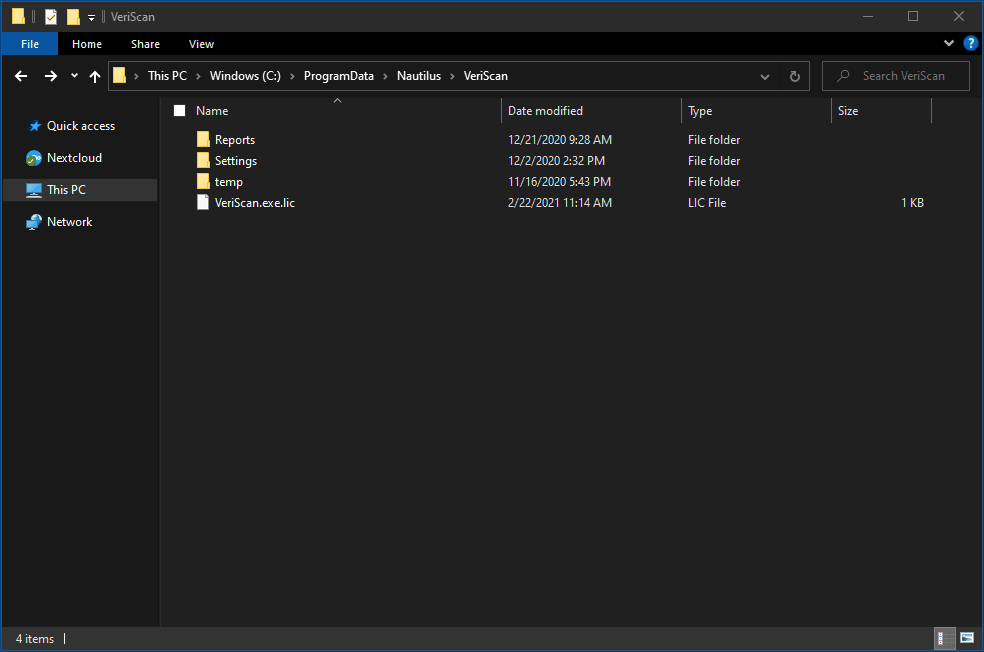
Navigate to the C:\ProgramData\Nautilus\VeriScan folder and delete the following subfolders:
| Folder Name | Full Path |
|---|---|
| Logs | C:\ProgramData\Nautilus\VeriScan\Logs |
| Raw Files |
C:\ProgramData\Nautilus\VeriScan\Raw Files |
| Unrecognized |
C:\ProgramData\Nautilus\VeriScan\Unrecognized |
| Unrecognized Images |
C:\ProgramData\Nautilus\VeriScan\UnrecognizedImages |
Optionally, you can delete the local database by deleting the VeriScanLocalDatabase.sdf file in this folder.
| File Name | Full Path |
|---|---|
| VeriScanLocalDatabase.sdf | C:\ProgramData\Nautilus\VeriScan\VeriScanLocalDatabase.sdf |
File Name Full Path
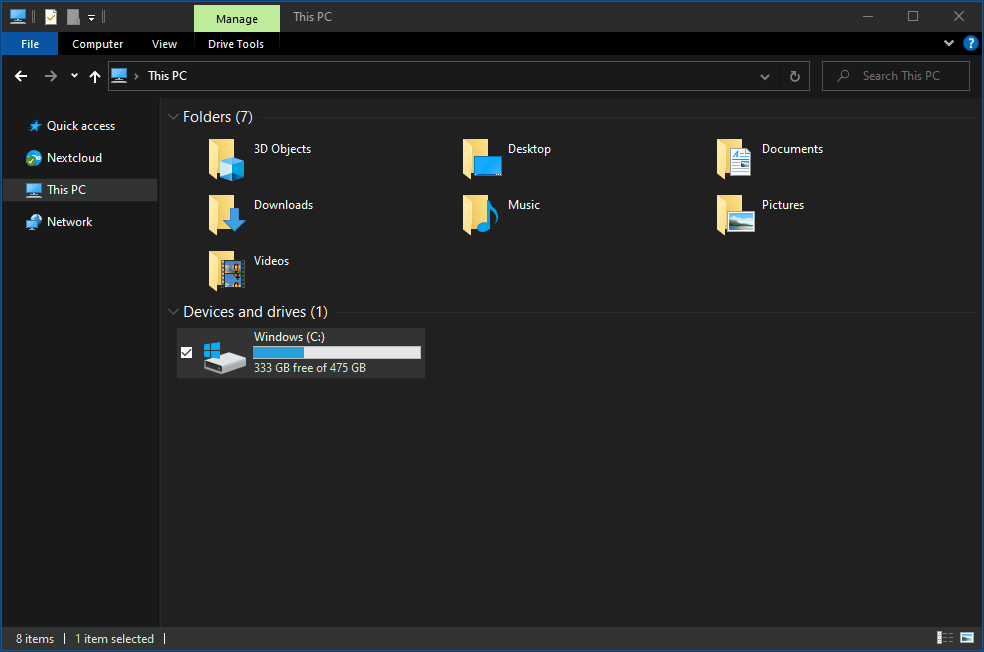
Open a File Explorer window and type %programdata% in the path bar.
Then navigate to Nautilus > VeriScan and select and delete the folders and files listed above.
Navigate back to the ProgramData folder and locate the C:\Programdata\VeriScan\ folder.
Delete the Images subfolder to remove all images of the scanned IDs.
| Folder Name | Full Path |
|---|---|
| Images | C:\ProgramData\VeriScan\Images |
Note that your saved images location may have been changed from the default location. You can double check the exact location in VeriScan > Scanners/Images > Save Image To
In The Online Portal
This section only applies if you have an active VeriScan Online subscription and wish to use online-only features.
If you are not using VeriScan Online, you can skip ahead to the In the Desktop App section.
Go to veriscanonline.com and navigate to Settings > Local Settings > Collection Information
In the dropdown menu, select Do Not Collect
Enable the checkbox for [✓] Encrypt ID#
Disable the checkboxes for each of the following settings:
- [ ] First Name
- [ ] Middle Name
- [ ] Last Name
- [ ] Address
- [ ] City
- [ ] ZIP
- [ ] DOB
- [ ] Allow search from devices
Set Allow History on Devices for [0] hours (0-200)
Then scroll to the bottom of the page and click the Save button to confirm your changes.
In the Desktop App
VeriScan Desktop 2.135.0 or greater is required to enable these features.
VeriScan Local Settings
Launch VeriScan 2.135.0 and wait for the main window to say "Ready."
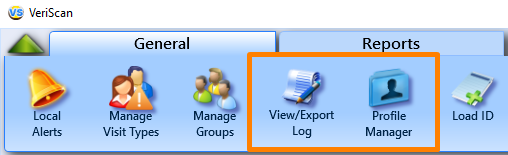
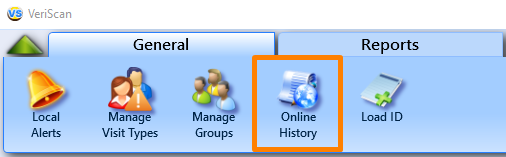
Confirm that there are no entries listed under the following menus:
| VeriScan (Offline Database) | VeriScan Online |
|---|---|
|
|
 |
 |
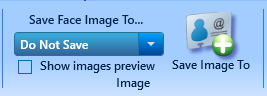
Next, go to the Scanners/Images tab and locate the dropdown labeled Save Face Image To...
Make sure that the dropdown is set to "Do Not Save"
Disable the [ ] Show Images Preview checkbox
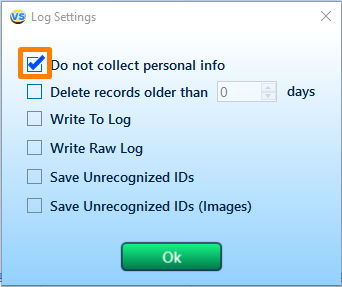
Next, navigate to the Setup > Log Settings menu.
Enable the checkbox for [✓] Do not collect personal info.
Ensure that all subsequent checkboxes are not enabled.
Press the Ok button to confirm your changes.
Finally, go to the View tab.
Disable the checkbox for [ ] Show History to hide the recent scans feed at the bottom of the main window.
This will completely disable logging to the Recent History view at the bottom, not just hide the feed.
Click the Hide Scan button and set the timeout to a non-zero number of seconds (we recommend 10-30).
Press the Ok button to confirm your changes.
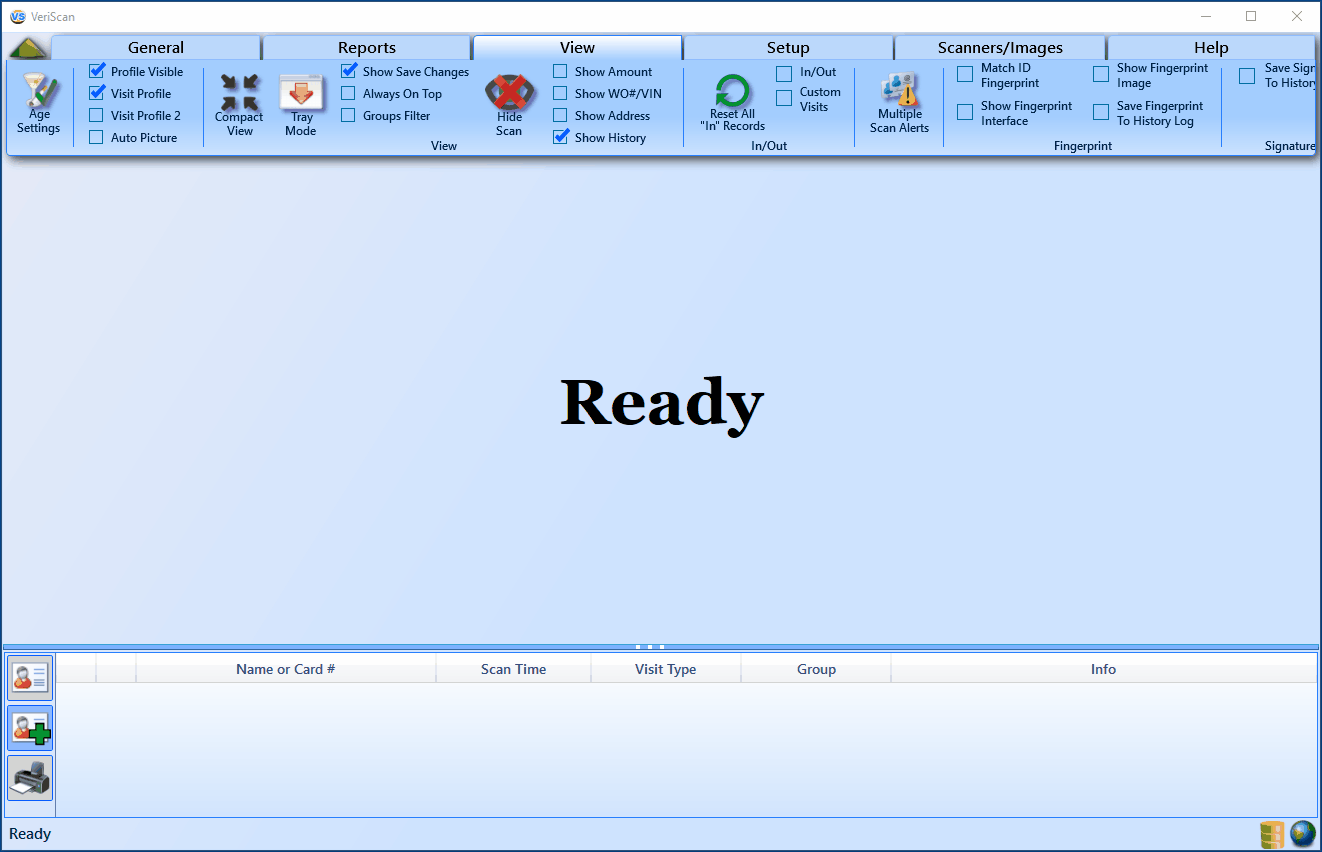
In addition to disabling the Recent History view, the button bar can be completely hidden as well.
Simply drag the ··· three-dot drag-adjustment bar all the way down and the three buttons will be hidden.

VeriScan Online In-App Settings
Navigate to the Setup > Set Data Sources and disable the following checkboxes:
- [ ] Upload attachments
- [ ] Upload Profile Photo
- [ ] Auto-Upload Offline Scans
Press the Ok button to confirm your changes.
