Introduction to WizzForms, ID scanning to form fill software
TABLE OF CONTENTS
Installation
Visit our website and download the latest version of WizzForms Desktop and the drivers associated with your scanner.
The WizzForms installer can be downloaded here.
Your device driver can be downloaded from here.
Install the driver and WizzForms Desktop software with the default configuration.
Once the installation is complete, you can use WizzForms in trial mode for 100 scans with all basic features enabled.
For an unlimited number of scans, you can register your software.
Registration
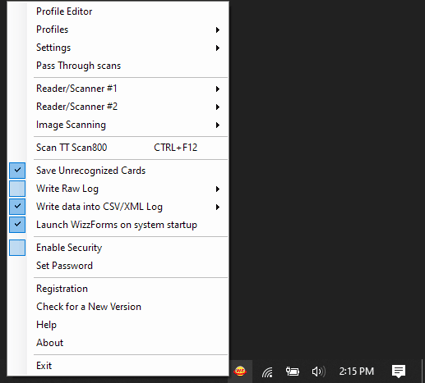
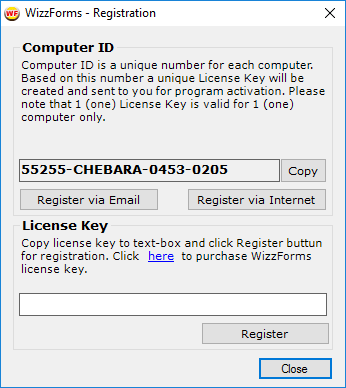
Open WizzForms, and if not prompted to Register, right-click on the WizzForms icon located in the system tray (typically located at the bottom right corner of your screen) and select Registration.
Select either Register via Email or Register via Internet to submit your registration.
Please include your order number. You will receive an email with the license key for your machine.
Please note that license keys are tied to the Computer ID. A license transfer requires contacting support@idscan.net where they will deactivate your old license and issue a current one for the new machine with the same expiration date.
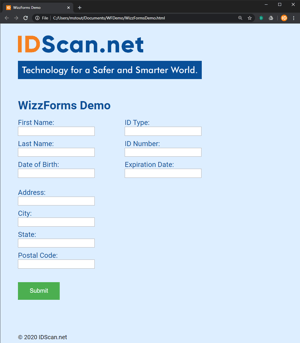
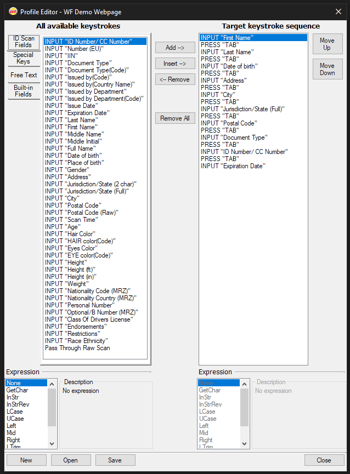
Profile Editor
The profile editor is what controls the automation process.
Here you can choose which keystrokes the software will emulate and in what order.
Some of these will be dynamic, such as the name of the person or the current time.
Other keystrokes are static (unchanging), such as pressing the "Enter" key.
Just add from the available keystrokes on the left to the target keystrokes on the right.
You can add fields from the ID Scan, Special Keys, Free Text, and some Built-in Fields.
A detailed guide on creating a customer profile can be found on our support portal knowledge base.
Write Data Into a Log File
WizzForms can also save data into a file directly on the disk instead of auto-populating a form.
Enable Write data into CSV/XML Log to store each scan in a file.
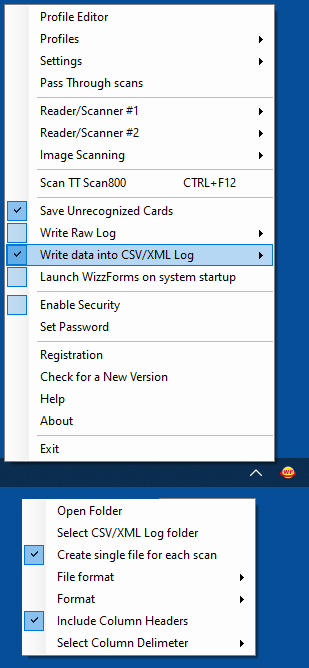
Open Folder
Opens the folder where the file will be saved in File Explorer.Select CSV/XML Log folder
Browse and set a new folder to store the file.If no file is found, a new one will be generated.
Create single file for each scan
Check this box so that each scan generates a new file.Uncheck so all scans will be stored in one long file.
File Format
Choose from the following file formats:- Excel compatible format (CSV)
- Extensible Markup Language (XML)
- Plain text file (TXT)