A guide to the VeriScan Online Alert Lists (Banned, VIP, etc.)
TABLE OF CONTENTS
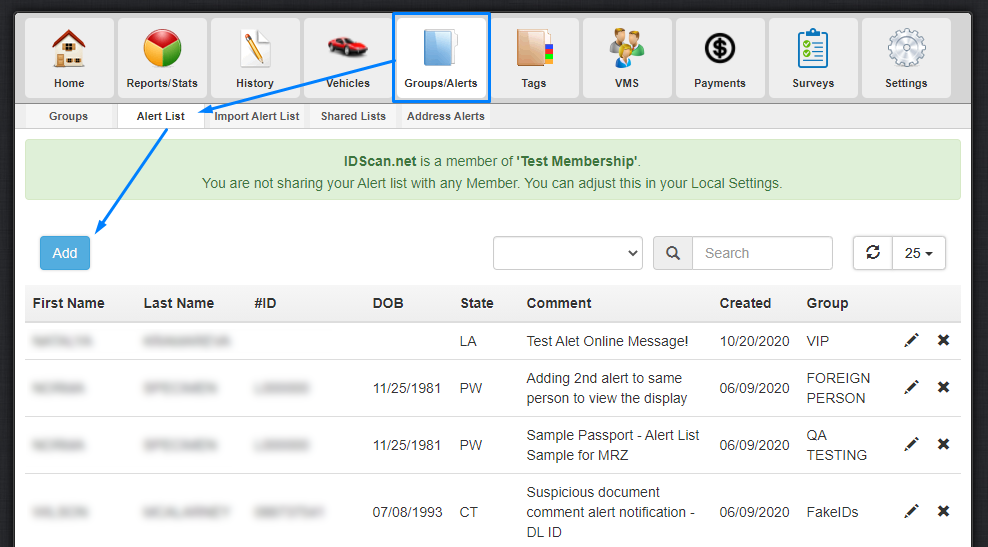
Adding an Individual to an Alert List
To add a name to your online alert list, you can go to veriscanonline.com > Groups/Alerts > Alert List > Add
The group is required so the popup appears on the screen. Depending on your device, the pop-up alert will show a message similar to this one:
"Matt Stout was found on the 'banned' alert list."
VeriScan will not automatically put the user into the banned group.
You must place them into the banned group manually after confirming their identity.
Even if the user is in a group, the alert pop-up will still appear until they are removed from the alert list on the portal.
This is to avoid banning every person with a common name.
I.e. "John Smith"
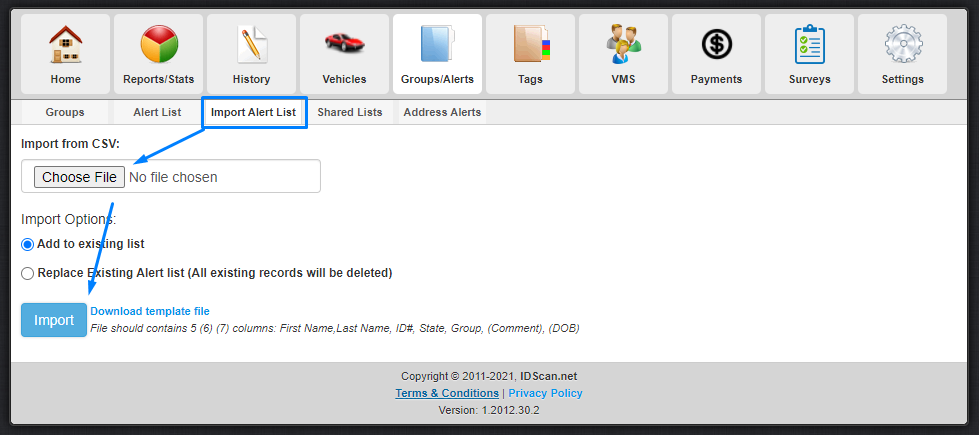
Importing an Alert List
If you have an excel compatible spreadsheet with a list of all banned users, you can import an alert list using a template.
This can be found under veriscanonline.com > Groups/Alerts > Alert List > Import Alert List
Enabling the Alert List Check
In the Portal
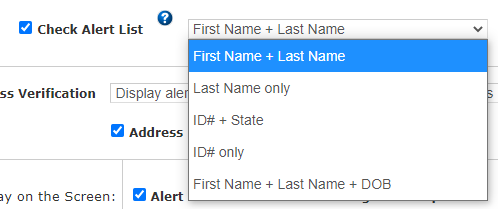
Finally, make sure that you enable local alerts under veriscanonline.com > Settings > Local Settings > Check Alert List
The acceptable combinations of user data to check against are listed in the dropdown box:
On Your Device
Depending on your device, you may need to enable alerts locally on the device:- VeriScan Online for Desktop
- General > Local Alerts > Show Popup
- VeriScan Online for Android
- ≡ Menu Button > Settings > Alert List Warning
- VeriScan Online for iOS
- Settings (Gear Icon) > Alert List Enabled