Starting in VeriScan v3.27, you can now add a second camera to capture an additional live photo at the time of scan. This is helpful if you need to capture something else besides the individual, such as a license plate or vehicle.
How to Enable
- Sign into the VeriScan Cloud portal.
- Click on Settings > Local Settings > Views.
- Enable Show Second Live Photo.
- Restart the VeriScan app or refresh your settings.
- In Settings > Devices, add your second camera.
Alternatively, if your devices are allowed to control settings locally in-app, you can enable Show Second Live Photo in Settings > Local Settings > Scan Results > Views.
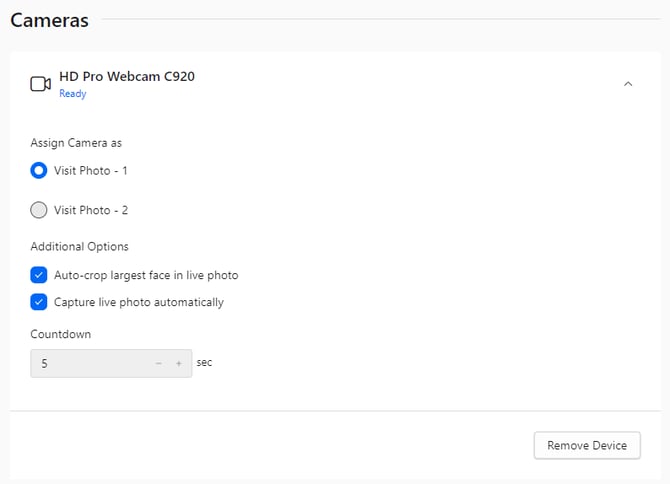
Note: Currently, two USB cameras of the same model cannot be configured at the same time. If you decide to use two USB cameras, make sure they are different models. Otherwise, any other configuration (USB + IP, two IP) will work.
Each camera has its own settings that can be accessed by expanding the menu. You can specify which of your cameras will be assigned as Visit Photo 1 and Visit Photo 2.
After configuring your settings, scan an ID.
Based on your configuration, the live photos will either be taken automatically or wait for you to capture them manually.
.png?width=670&height=410&name=second-live-photo(1).png)