Table of Contents
- E-Seek M200, M210, M250, M260 Setup
- E-Seek M280 Setup
- Thales (Gemalto) Setup
- ID Tech Setup
- SwiftScan Setup
ID Scanner Setup
IDScan.net supports a variety of ID scanning devices, such as scanners by E-Seek, Thales (formerly Gemalto), and Panasonic.
Drivers for our all of our supported ID scanners can be found on our website here.
A Quick Start Guide which contains overall instructions for scanner setup can be viewed here.
E-Seek M200, M210, M250, M260 ID Scanner Setup Instructions
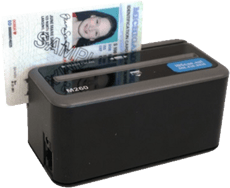
- Plug scanner into any available USB port
- Download driver from our website here.
- Run the file CDM21228_Setup.exe
- Follow prompts to install the driver
- Connect your device to your scanning software
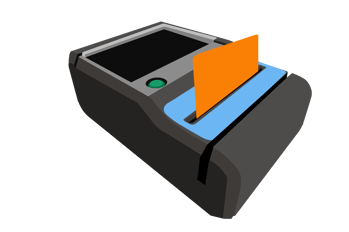
E-Seek M280 ID Scanner Setup Instructions
Download a PDF Quick Start Guide for the E-Seek M280 >>
- Plug scanner into any available USB port
- Download BOTH drivers from our website here. (Driver Download and Image Driver Download)
- Extract the M280v2_Driver.zip file
- Run the setup file CDM21228_Setup.exe
- Follow prompts to install the driver
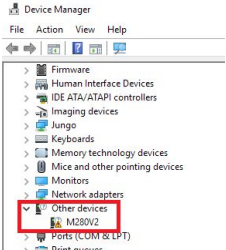
- Open the Device Manager and look for Other Devices > M280V2
- Right click on M280V2 and select Update Driver
- Select "Browse my computer for driver software"
- Navigate to the folder where you extracted the M280V2_Driver.zip file earlier.
- Select your appropriate OS and click Okay
- Connect your device to your scanning software
E-Seek ID scanners as well as magnetic readers with USB cables are considered “Serial Devices”, and thus need to be configured accordingly. You can only use one scanning device at a time. If you are not sure which COM port to select for your reader, simply refer to Device Manager via the Hardware and Sound tab in Control Panel*. Once in Device Manager, use the drop down under Ports (COM & LPT).
*If running Windows 10, Control Panel can be accessed by using the Search feature (Windows Key + S), or by right-clicking the Start button.
Thales (Formerly Gemalto) ID Scanner Setup Instructions

- Plug scanner into any available USB port
- Download the appropriate driver from our website here.
- Run install file and follow prompts to install the driver
- Restart VeriScan
- Select the Scanners/Images tab from the top menu
- Click on Page Reader Settings
- Select connected scanner serial number from the drop down
- Click OK
- Connect your device to your scanning software
ID Tech ID Scanner Setup Instructions
- Download driver from our website here.
- Plug in your scanner and allow Windows to install the basic drivers
- Unzip your downloaded file (USBCDC_Driver_A.zip) until you are left with the folder 80066803-004_USBCDC_Driver
- Open Device Manager on your PC
- Click on Ports and right-click USB Serial Device
- Update driver
- Select Browse my computer for driver software
- Point it to your previously unzipped folder, then click OK
- Select Next and Windows should install update the scanner with the required drivers
- Connect your device to your scanning software
SwiftScan TS200 by Unitech
The SwiftScan TS200 by Unitech has 2 USB-ends on the cable.
One of the USB-ends has a cable branching back to the device as well as another branching to another USB port. Plugging in both USB-ends ensures that the device has enough power. A USB-hub can be used in the event that your computer does not offer enough USB ports to successfully power the device.
- Plug the RJ45 connector end of the cable into the scanner.
- Plug in both USB ends into the computer or a powered USB hub.
- Connect your device to your scanning software
Connecting Your Scanner to your Desktop Software
|
|
 VeriScan
 ParseLink
Create a support ticket here if you don’t see your scanner setup instructions listed.