Collecting a Document with the Document Collector
When you need to capture an ID document for testing purposes, the Document Collector will create a secure file you can send back to the team containing all relevant information needed to identify and test the document.
Open the VeriScan for Windows app and navigate to Settings > Help > Document Collector.
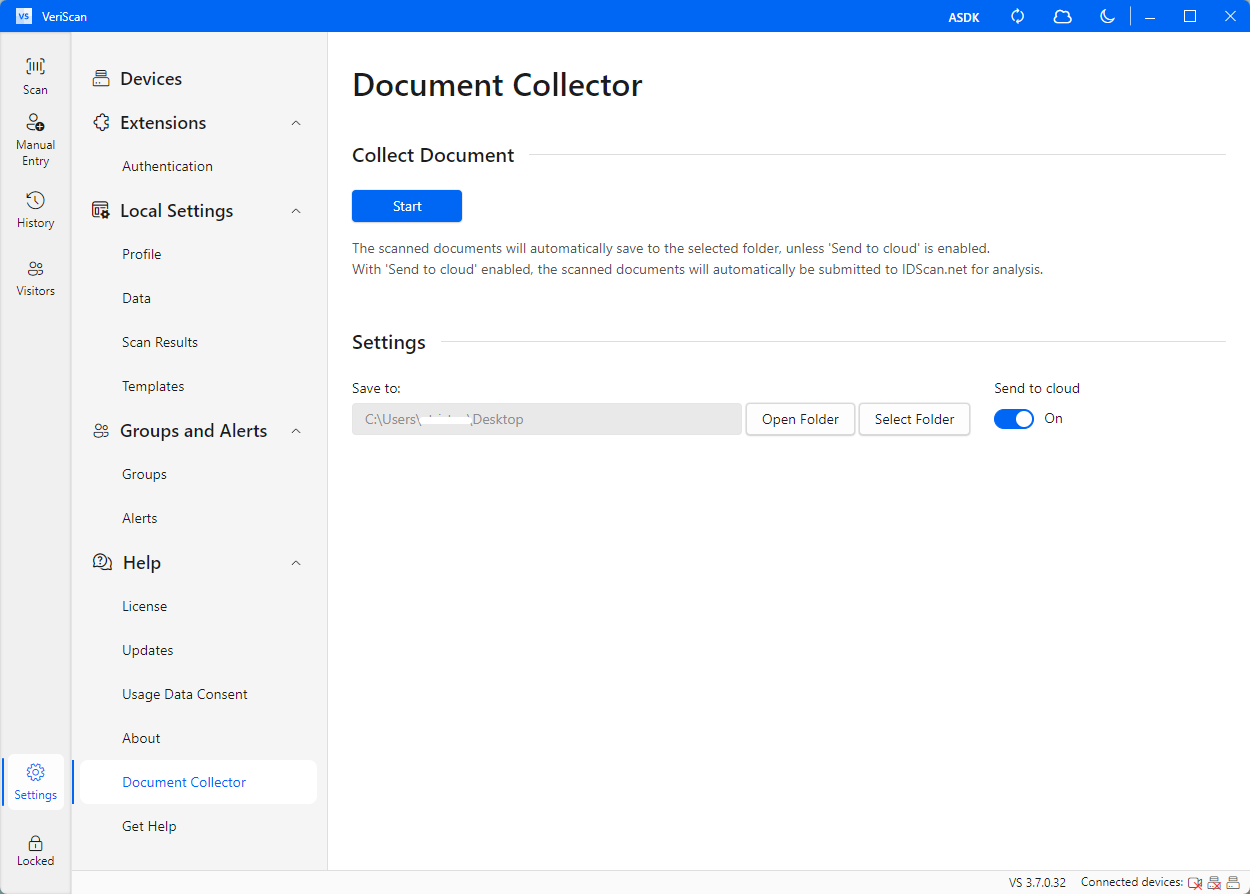
Files can be saved locally or uploaded to the server. For an easier document collection process, make sure the Send to cloud option is set to On.
With your scanner connected, click on the Start button. An additional window will open up with a Please scan message.
Scan your ID document as you normally would. If using a scanner the requires you to scan the other side of the ID, be sure to do that when prompted.
When the process is complete, a Document Successfully Collected message will appear, along with the images captured by your scanner.
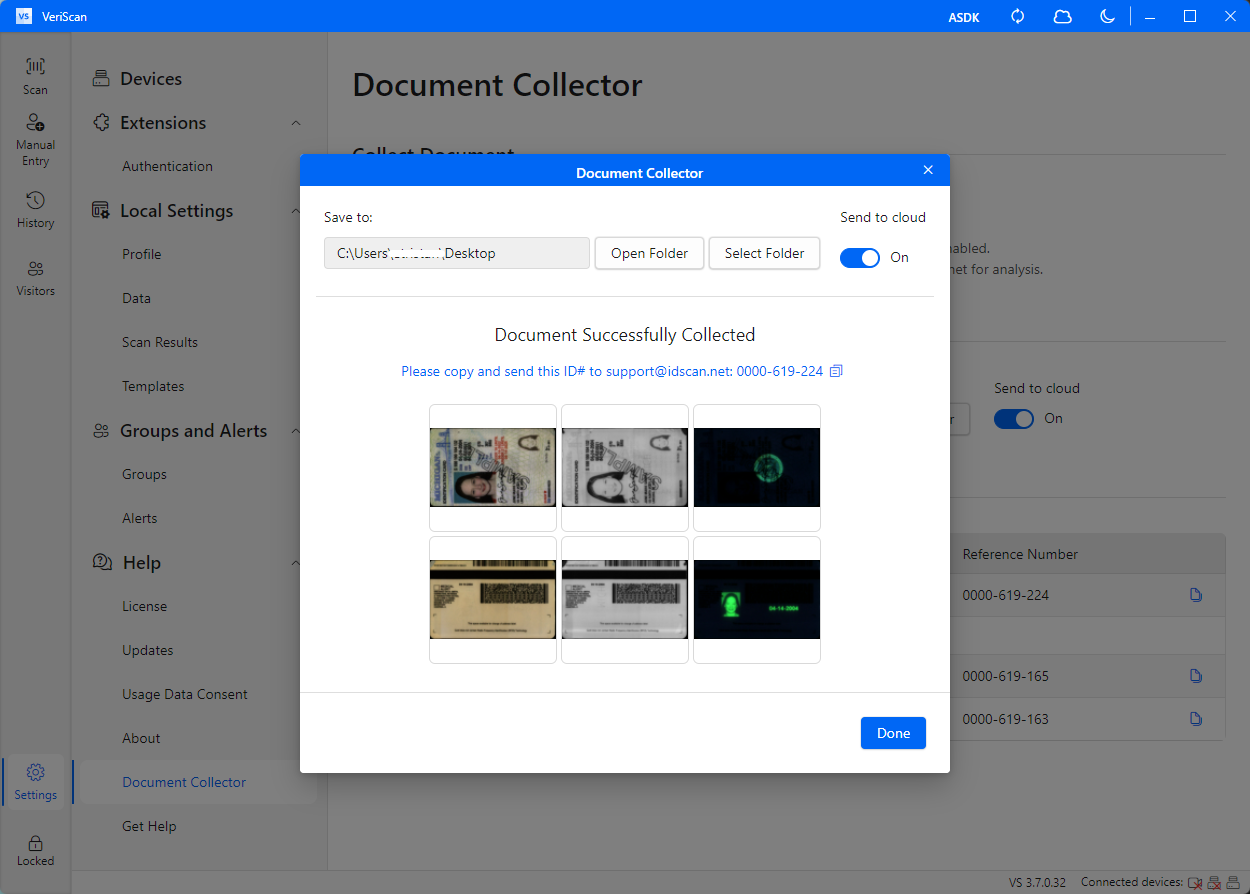
If the Send to cloud option was enabled, you should have an unique ID# displayed above your images. Copy the ID# and send it to support@idscan.net.
If you had the Send to cloud option disabled, select the Open Folder button in the window. This will open up the location in which the proprietary .IDS files are located. Attach the file to an email and sent it to support@idscan.net
Once finished, select Done.