Table of Contents
Enabling the In/Out Tracking Feature
Using the In/Out Tracking Feature
In/Out Tracking is available for Premium, Enterprise, and ID Authentication plans.
Enabling the In/Out Tracking Feature
VeriScan Cloud Admin Portal
- To enable the In/Out Tracking feature, sign into your veriscancloud.com portal.
- Navigate to Settings > Local Settings > Capacity.
- Enable In/Out Tracking
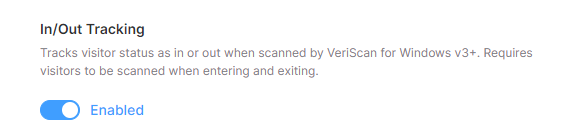
In/Out is tracked by location, so visitors can scan in on one device and out on another as long as those two devices are set to the same location. Scanning on a device at a different location will mark the visitor as 'in' for both locations.
VeriScan for Windows App
- Restart your VeriScan app or use the settings refresh button
 in the top bar.
 - Make sure Recent Visitors is enabled on the Scan Results screen (Settings > Scan Results > Show Recent Visitors.
- Select the Configure Columns button to verify the In/Out Status toggle is enabled. This shows the current status of the visitor.
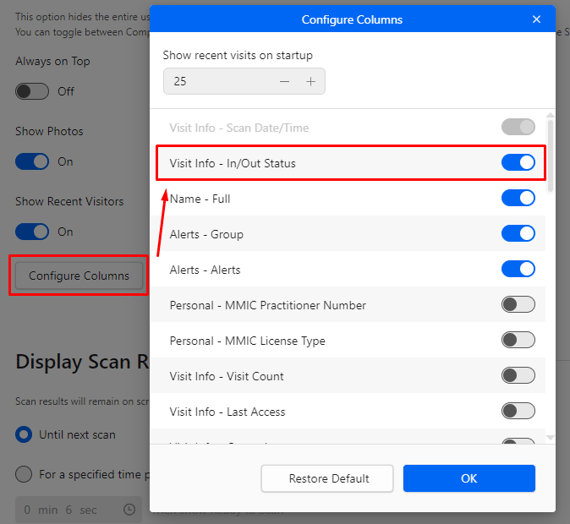
- In History, use the Configure Columns button to verify the In/Out Status is enabled. This shows the current status of the visitor.
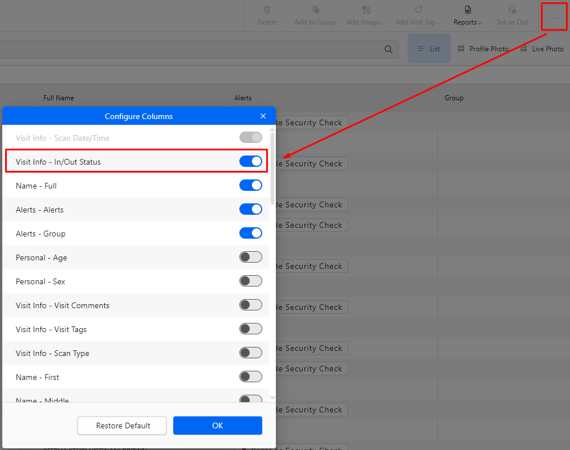
- In Configure Columns, there is a similar available column called Visit Info - In/Out History. This reflects whether that particular scan function as a check IN or OUT.
Using the In/Out Tracking Feature
Setting a visitor as IN
Upon enabling the In/Out feature on your account, everyone should be marked as OUT.
To scan someone IN, simply scan their ID. Their In/Out Status is reflected in Recent Visitors and in History.

Setting a visitor as OUT
Scanned IDs can be set as OUT a few different ways:
- Scan the visitor's ID again
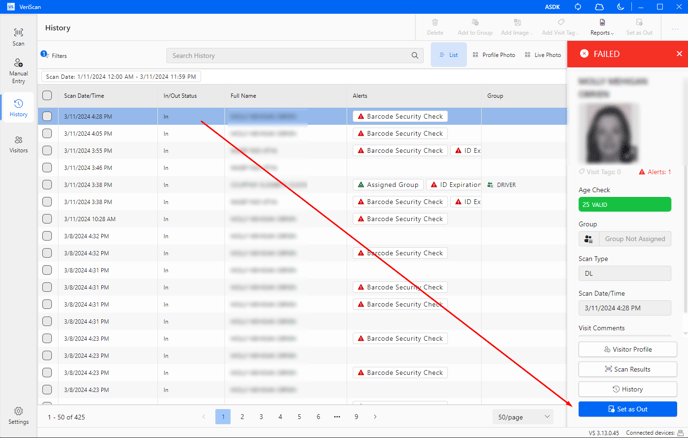
- From the Scan Results page, select the visitor from Recent Visitors, then select the Set as Out button

- From History, select the check box to the left of the history entry, then select the Set as Out button

- From History, click anywhere on the row of a history entry, then click the Set as Out button in the panel at right
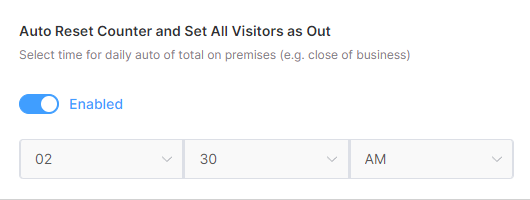
- In the VeriScan Cloud portal, you can specify a time of day all visitors will automatically be marked as OUT.
Reporting
The In/Out Tracking feature comes with two reports, In/Out Report and Emergency Roster. Both can be generated from within the app in History > Reports or in the VeriScan Cloud portal under Reports.
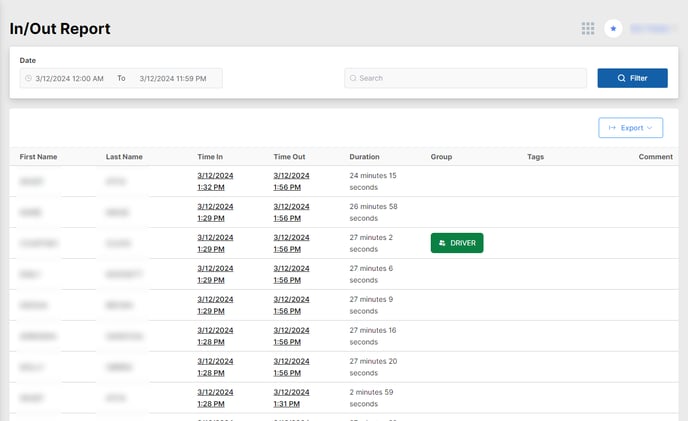
In/Out Report
The In/Out report tracks the time someone was scanned IN, set as or scanned OUT, and the duration of their visit.
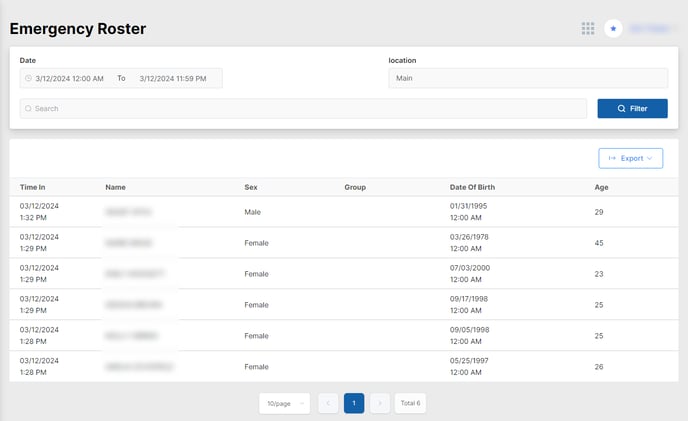
Emergency Roster Report
The Emergency Roster report will show you everyone who is considered IN. This is useful in the event of an emergency situation when you need to account for everyone that could potentially be on your premises.