Set up your VeriScan Cloud account
Set up VeriScan in the Backoffice
Complete the setup in VeriScan Cloud
Overview
VeriScan is a cloud-based ID scanning and age verification tool that syncs seamlessly with the Dutchie platform. IDScan.net is the parent company of the VeriScan product.
If you’d like more information on ID scanning for dispensaries, check out the IDScan.net web page on cannabis dispensary ID scanning.
VeriScan scans the 2D barcode on the back of the ID, or the machine readable zone (MRZ) on a passport, and parses the information stored there, allowing you to validate and check-in customers quickly and efficiently. Newly scanned IDs will create new Dutchie customer profiles, and subsequent ID scans will add to the customer’s visit history.
VeriScan also provides age verification and ID authentication. Age verification can be performed using any device. ID authentication and catching fake IDs requires specialty hardware such as the CR5400 or M500. All Dutchie-compatible hardware can be purchased directly on the IDScan.net website.
Quick Guide To ID Scanner Selection >>
VeriScan supports more than 2,700 ID formats. It can scan all North American government-issued IDs, global passports, military ID cards.
Things to Know
VeriScan ID scanning is compatible with Windows, Android, and iOS. Contact your sales representative for information about alternative ID scanning solutions for macOS.
If you want to use VeriScan for multiple unique guest lists (Adult Use vs. Medical in the same location, or different store locations) you'll need separate PCs or tablets for each guest list and an ID scanner for each PC or tablet.
The E-Seek M280 ID scanner works for most states' IDs. Colorado IDs issued between 2016 and 2021 have a barcode defect that requires the E-Seek M500 ID scanner.
If you haven't already purchased ID scanners through Dutchie, you can order them from IDscan.net. You do not need to purchase any software from IDScan.net, your ID scanning licenses will be billed through your Dutchie account.
If you are looking to catch a high degree of fake IDs or meet the highest standards of age verification, you will want to purchase VeriScan Authentication, and will need an ID scanner capable of performing document authentication. The E-Seek M500, Thales AT9K, and Thales CR5400 are all compatible with VeriScan Authentication. The IDScan.net team can help you purchase VeriScan Authentication.
Set up your VeriScan Cloud Account
If you haven't already done so, create a VeriScan account.
- Log in to the VeriScan Cloud Portal at veriscancloud.com
- Go to Access Management > Devices and create logins for each PC or tablet you plan to use.
- Open a ticket with Dutchie POS Support to have the integration activated and provide your VeriScan organization name and account email address.
Set up VeriScan in the Backoffice
After Dutchie POS Support has activated the IDScan.net integration for you:
- Go to Settings > Integrations > IDScan in the Backoffice.
- Click Generate.
Copy the auto-populated URL as you'll need to paste this URL in VeriScan later. - Select Yes from the Enabled dropdown field.
- Enter your Location Name as you want it to appear in VeriScan.
You'll enter this same location name into VeriScan later. - Click Update.
Create a Waiting Room
- Go to Settings > Rooms.
- Click Add room.
- In the Room Name field, enter the waiting room.
- From the Is Waiting Room dropdown, choose Yes. Leave all other dropdowns set to No.
- Click Update.
- Go to Registers > Configure > Guestlist status and make sure you have a Default status set.
Complete the setup in VeriScan Cloud
Log in to the VeriScan Cloud Portal at veriscancloud.com
Set Up Your Location
- Click Locations in the sidebar.
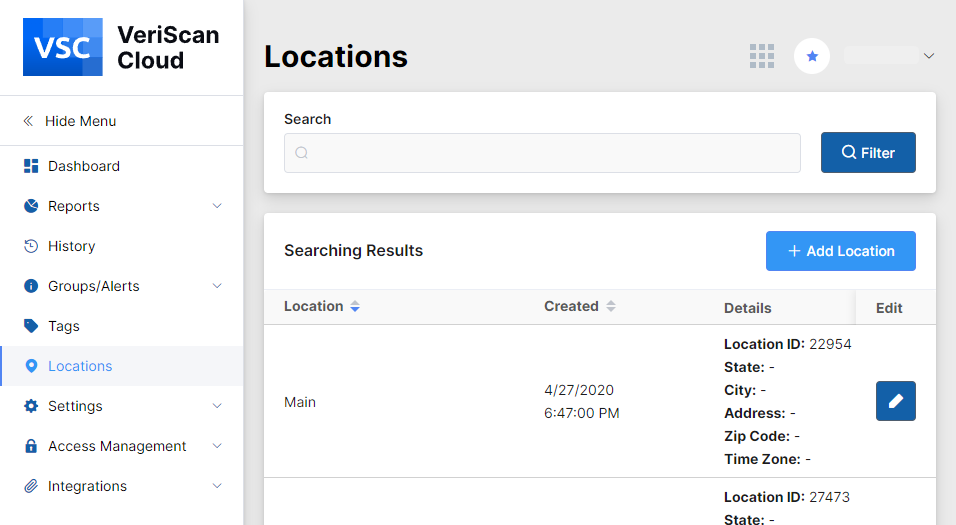
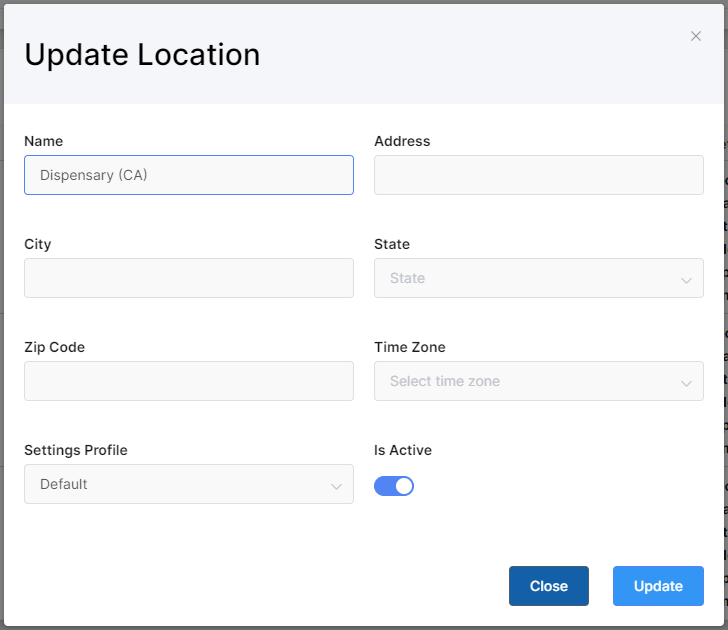
- Click the Edit button next to the Main location.
- Enter the same Location Name you entered in the Dutchie Backoffice and click Update.
VeriScan Webhooks Setup
- In the sidebar, click Integrations > Webhooks
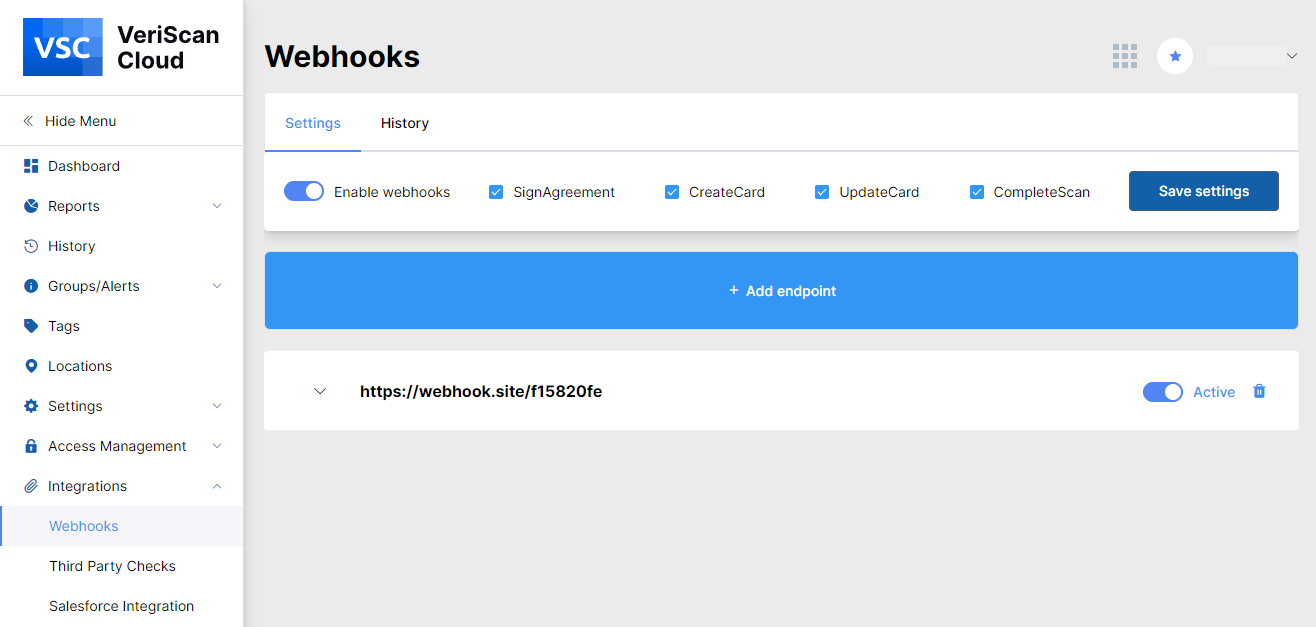
- Check the Enable Webhooks checkbox.
- Ensure that Sign Agreement, Create Card, Update Card, and Complete Scan are enabled.
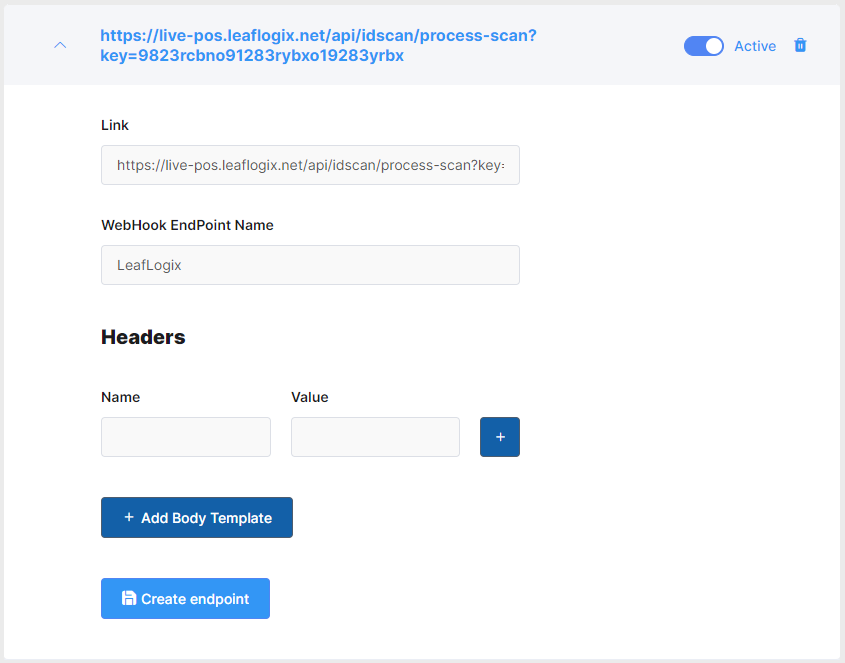
- Click the Add Endpoint button.
- Copy and paste your Webhook URL from the Dutchie Backoffice in the Link field.
- Check the Active checkbox.
- Click the Create Endpoint button to save.
If you change your Location Name, be sure to:
- Update it in both the Dutchie Backoffice and in VeriScan.
- Generate a new Webhook URL in the Backoffice and paste it into VeriScan.
Setting Up Additional Devices
Contact Dutchie Support to have additional devices set up. Once your representative has confirmed your subscription and you have generated a Webhook URL:
- Go to VeriScan Cloud > Locations
- Click the blue Add Location button
- Type in Location Name as it appears in Dutchie POS Backoffice > Settings > Integrations > IDScan > Location Name
- Confirm the Is Active checkbox is selected
- Click the Create button
- Go to Access Management > Devices
- Confirm your login for this new device is set up here.
Install VeriScan for Windows
Install the VeriScan App
(Skip this section if you're using a Panasonic TOUGHBOOK FZ-N1)
- Go toIDScan.net's Downloads Page and click Download VeriScan for Windows.
- Run the installer and follow the installation steps.
- Install the necessary drivers from the IDScan.net Drivers Download page.
Connect the VeriScan App to the Cloud
- Open the VeriScan App and go to Settings > Data.
- Enter your Device Login and Password and click Verify.
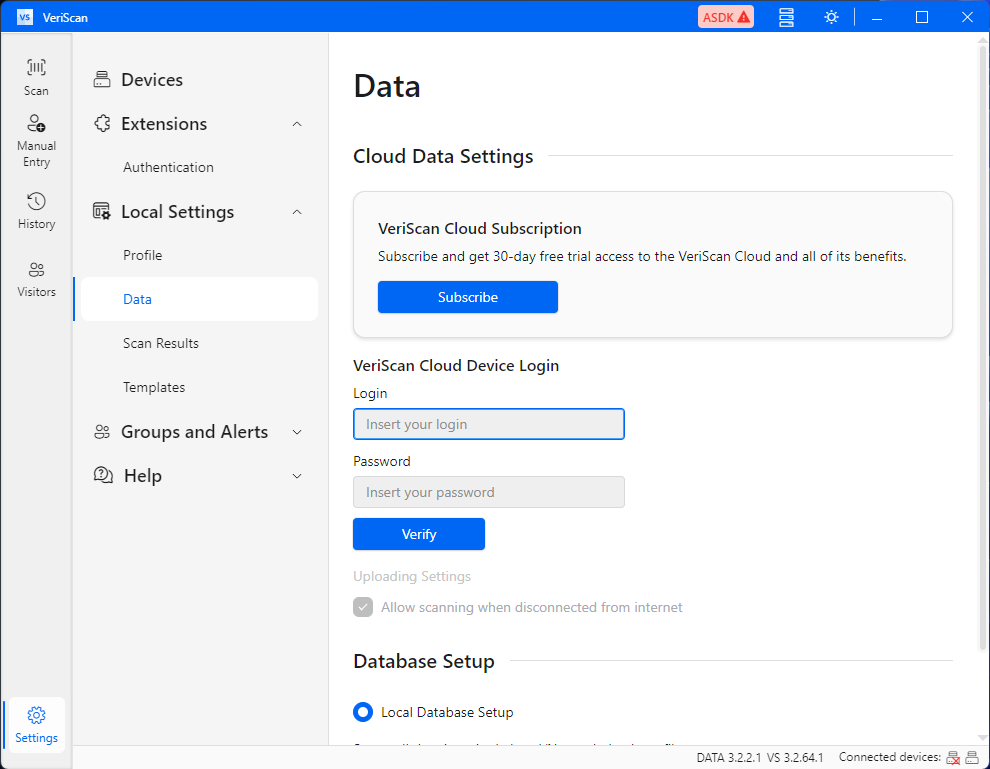
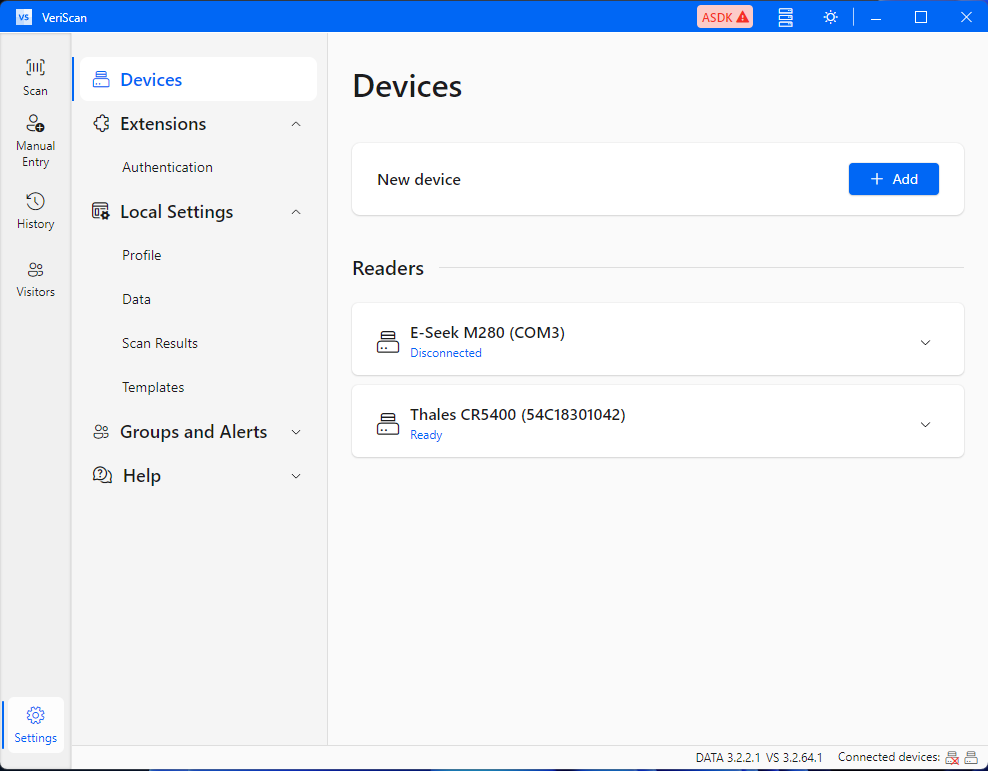
- Go to Settings > Devices and click the Add button to add a new device.
- Select Reader and select your device from the list of devices.
You can view and update your device logins and passwords in the VeriScan Cloud Portal. Go to Access Management > Devices and click the Edit icon.
Using VeriScan on your PC
The ID Scan integration is now set up, and you are ready to test.
- The VeriScan Desktop app needs to be running but does not need to be open and visible.
- Open the Dutchie POS Register and click on Guest List (do not use Security Check-In)
- Use the Top Down Insert with a Driver's License. If you hear a beep, the ID was scanned successfully.
- When you scan the ID of a customer whose Dutchie POS profile information is an exact match to their ID, the customer is automatically checked in.
- When you scan the ID of a customer who does not have a matching profile in Dutchie POS, VeriScan automatically inputs and parses their ID information to create a new customer profile.
Install VeriScan for Android
Set up your Android device
Click here to identify your device and follow the configuration guide.
Install VeriScan for iOS
Download a PDF guide to using VeriScan on an iPad >>
- Download the Veriscan Online app from the App Store.
- Launch the app and navigate to Settings.
- Click Login/Sync and enter your device login and password.
Standard workflow
- Navigate to the Scan page by clicking the first icon on the bottom of the app.
- Click the camera scan button to access the camera.
- Place the barcode of the ID being scanned into the camera frame.
- The data will be populated into Dutchie POS.
- Any optional comments, groups, or tags can be added to the profile.