Device Overview
The Panasonic FZ-N1 comes with 3 buttons on the rightside, 2 buttons on the left side, and a touchscreen navigation bar at the bottom of the screen. The power button is located at the top of the device.
| Left Side Buttons | Top Buttons | Right Side Buttons |
|
|
|
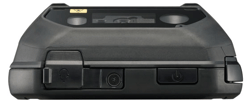
| Top-Down View | ||
 |
||
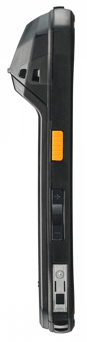
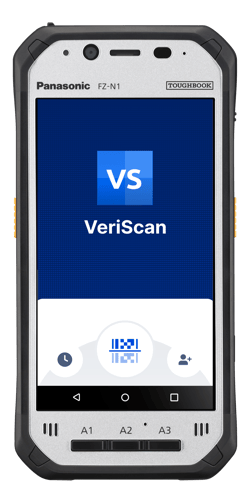
| Left Side View | Main Screen | Right Side View |
 |
 |
 |
Scanner Setup
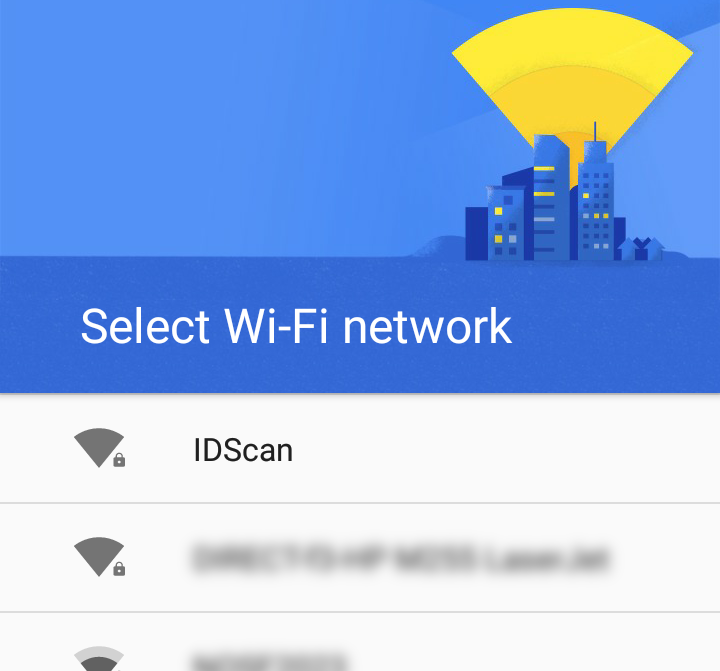
Before you can use the VeriScan app with your Panasonic FZ-N1 scanner, you must first complete Google setup wizard to connect to WiFi and sign into your Google Account. Afterwards, you will need to go into the Universal Scanner Settings app to enable scanning Driver's Licenses and Passports.
This section will show you how to complete the setup wizard and configure your scanner for use with Driver's Licenses and Passports.
First-Time Setup Wizard
- Turn on the device by holding the power button on the right side of the device.
|
|
|
|
|
 |


- At the Google Sign In screen, enter your Gmail address for this device.
|
We recommend using a generic Gmail address for your company to setup your device. This will allow you to:
|
 |
If you don't want to use your personal email, talk to your IT team about creating a new Gmail account just for VeriScan. It only takes a few minutes and it's free!
- When prompted, Accept the terms and conditions for Google Services.
- When prompted, you can set a PIN number to lock the device.
- We recommend using a PIN number to secure your device.
- This will keep your device secure if lost or stolen and prevent unauthorized users from accessing your sensitive data.
Once your device is connected to the internet and signed into Google, you'll need to configure the barcode scanner on your device to accept Drivers Licenses and Passports.
You'll also be able to disable unwanted barcode types to ensure VeriScan only scans the secure PDF417 Barcode on the back of the ID.
To get started:
- Swipe up on the home screen to access the apps drawer
|
- Tap on the Symbologies option
- Enable the checkbox for PDF417
- Disable all other checkboxes in this list
- Tap the back button to go back to the Barcode Reader settings page
- Tap on OCR Settings
- Enable the checkbox for OCR-B
- Ensure that OCR-B Variant is set to ICAO Travel Documents
Installing VeriScan
Creating a new VeriScan Account
Are you a new customer?
Create a VeriScan Account so you can sign into the VeriScan app.
If you have not signed up for a VeriScan account, you can use one of these guides to get started. After you have completed the steps, be sure to click on the VeriScan for Android Setup option at the bottom of the page.
 |
VeriScan Basic | Create a new VeriScan Basic Account |
|
VeriScan Premium | Create a new VeriScan Account |
|
VeriScan Enterprise | Create a new VeriScan Account |
Download VeriScan on Your Android Device
Already have an account?
Download the VeriScan app and sign-in with your existing device login.
Once you have a VeriScan Account, you are ready to download the app, connect it to your account, and start scanning. To get started, you can use this guide:
| VeriScan for Android | VeriScan for Android Setup |