How do I save Authentication results after each scan?
Enable exporting the Authentication report to a PDF file automatically after every scan or manually from the Authentication results view. Requires ParseLink 2.5+
- Saving Authentication Reports Automatically
- Saving Authentication Reports Manually
- Understanding the Authentication Report
Saving Authentication Reports Automatically
On ParseLink enterprise, you can automatically save the authentication details as a PDF file after each scan. To get started, enable the Authentication engine in the ParseLink menu.
Right-Click Menu > Verification > Authentication Settings
|
In the Authentication settings window, you should see a new option called "Save report after each scan."
|
 |
Changing the Default Save Directory
To select a different folder on your PC, click on the Select Folder button to open the folder selector window. You can use this window to select any location your PC can access.
There are two different ways to set the location:
- Copy the raw path directly into the textbox
- Use the Three Dot Menu to open your directory tree and browse for a folder
You can select any folder on the Windows C: drive, any hard drive or other storage attached to your PC, network drives, and shared directories on your local network server.
It's a good idea to click the Open button to ensure ParseLink is able to access the directory.
Be sure to click the Save button to save the location before closing the window.
Saving Authentication Reports Manually
If you don't want to save every authentication report every time, you can also save the report manually after each scan.
Ensure that Authentication is enabled in the Authentication Settings, then scan an ID.
The Authentication status window should appear with the overall result. Click on the Details... button to open the Authentication details window.

In the top bar, there is now a Save icon on the left side.

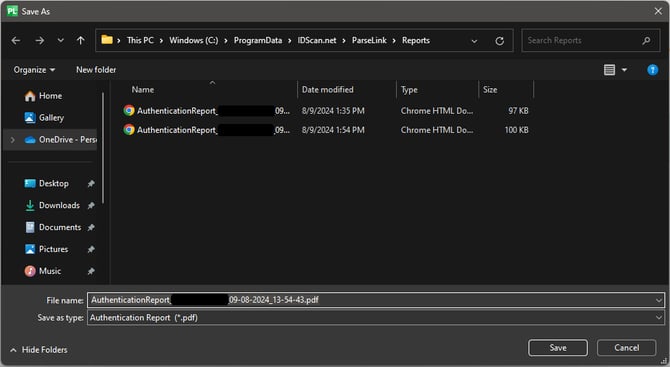
Clicking on the button will open the Save As... dialogue option in Windows Explorer. By default, it will try to save the report to the folder set in the Authentication Settings window described above.
You can select any location and rename the report as needed for each ID, or leave the name and directory at the defaults for even quicker saving.
Click on Save button in the Windows Explorer window to save the report with the set name and location.

Understanding the Authentication Report
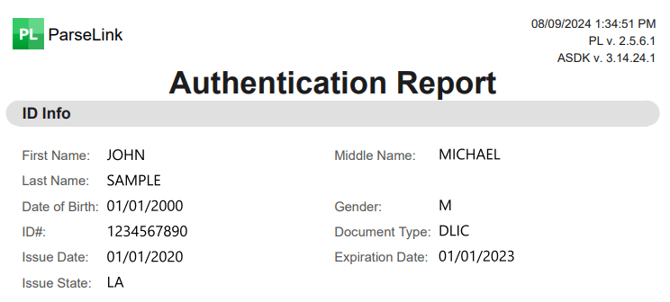
ID Info
This section contains basic information collected from the ID. Here you can find details such as the visitor's full name, date of birth, and gender. You can also see ID information such as the document type, ID number, issue date, and expiration date.

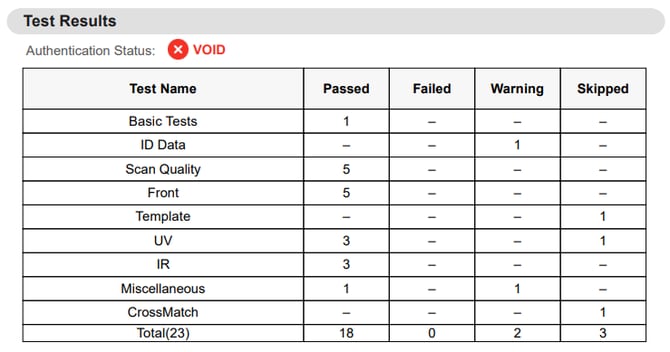
Test Results
At the top of this section, there is an Authentication Status. This is the overall conclusion found by the Authentication Engine. Typically, and ID will give a value of Pass, Warning, Fail, Expired, or VOID, depending on the outcome of the tests.

To get a better idea of how the Authentication Engine determines the authenticity of an ID, you can use the table listing out the different test categories and the total number of passed, failed, warning, and skipped values for each subtest.
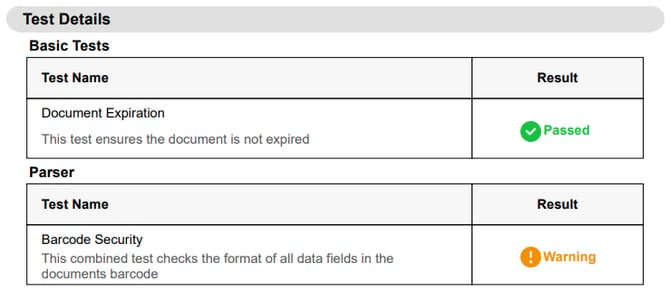
Test Details
This section lists out each subtest that was run on the ID using the Authentication engine.

Each test is broken out into different categories and listed in the same order as they appear in the Authentication Results popup. There is a description of each test along with the result of the test for this particular ID.