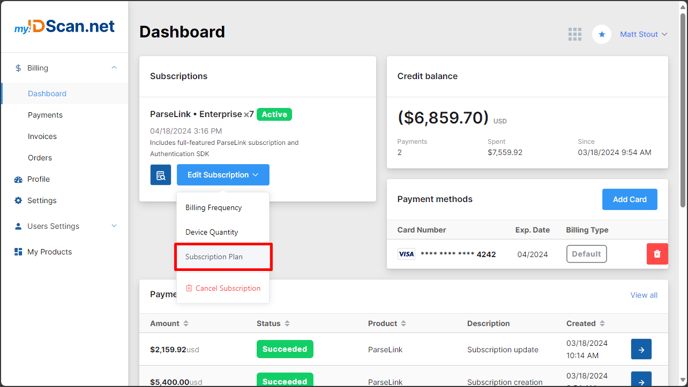
Switching your subscription tier is easy, simply log into my.idscan.net and go to the Subscription Dashboard. Hover over the Edit Subscription button and select Subscription Plan.
If you have a compatible scanner, and you'd like to use our Authentication SDK to help catch fakes using UV, IR, and image checks, upgrade to the Enterprise tier.
The tier you are currently on will have a Change Options button you can use to edit your billing cycle or device quantity.
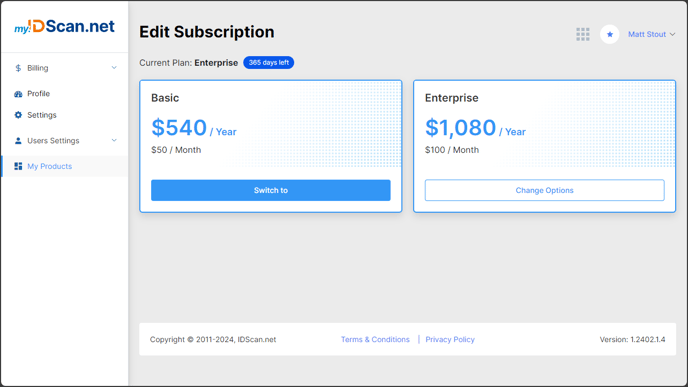
You can switch tiers by selecting the Switch to button on the tier you don't currently have selected. Doing so will open the Customize Purchase window where you can select a billing cycle and device quantity under the new tier.

Important:
Make sure that the number in the Quantity box is the total number of devices you will be using on your account.
After you have selected your new tier, billing cycle, and device total, you will be presented with a billing breakdown. On this breakdown, you'll see:
- Charges for your new subscription tier
- Any discounts applied at the time of change
- Credits for unused time if you're downgrading tiers
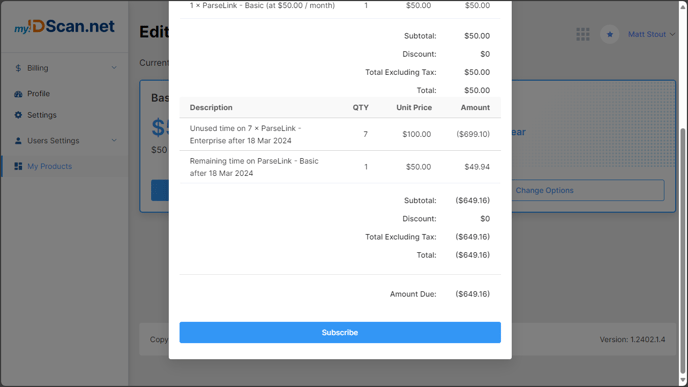
After you can confirmed the charges, click on the Subscribe button to update your subscription.
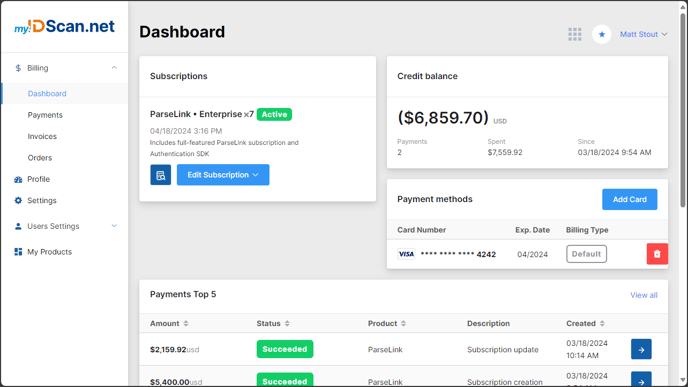
Credit Balance
You will be credited for unused time on your subscription when changing tiers. If your unused time credits are more than your new monthly or annual total, my.idscan.net will charge you again after you have spent the entirety of your credit balance.