Table of Contents
Profile Editor
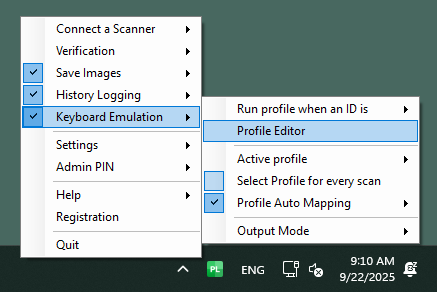
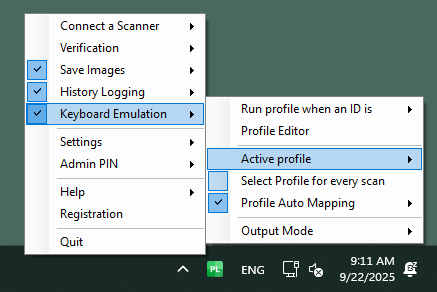
From the right-click menu, select Keyboard Emulation> Profile Editor to get started creating your first profile.
A window will appear with two columns of automatic actions.
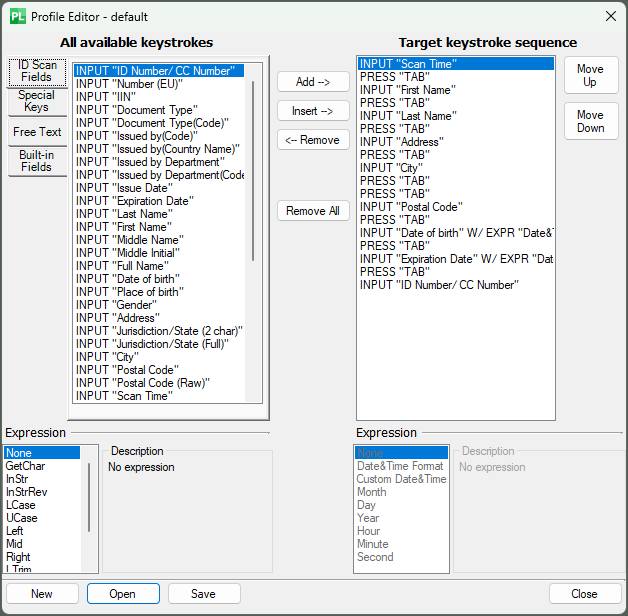
All available keystrokes
On the left side of the window, you'll see a list of all available actions ParseLink can take. There are four sections of special ParseLink actions, and each can be customized using the Expressions menu at the bottom left of the screen.
- ID Scan Fields are inputs taken directly from the ID, including name, ID number, date of birth, etc. Use these options to fill out specific fields in your existing form.
- Special Keys are keyboard special keys, such as TAB, BACKSPACE, ENTER, etc. You can use these to navigate around the form, such as using TAB to get to the next field in the list.
- Free Text fields allow you to input any custom input. Note that these cannot be changed dynamically, so use this for any input fields that are always the same.
- Built-In Fields are special fields related to time and special actions. Use these to activate specific windows, wait for a time delay, wait for a user input, or input fields related to the system.
Customizing a Profile
Start the profile by selecting New at the bottom left, and assigning a name to the new profile.
To create the profile, its easiest to navigate the form you wish to fill out using the keyboard.
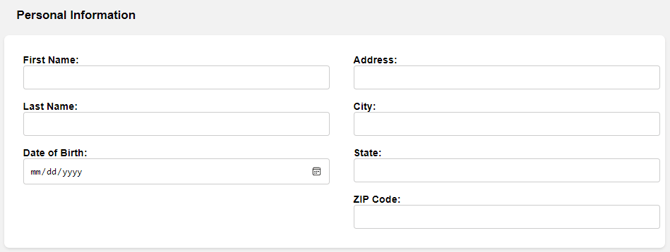
In the above example, you would use your keyboard to fill out each field like so:
FirstName -> TAB -> LastName -> TAB -> Date of Birth -> TAB ->
Address -> TAB -> City -> TAB -> State -> ZipCode -> ENTER
Let's build a profile for the example above. In order to get ParseLink to fill this form correctly, you would create a profile with the following actions:
| Intended KeyStroke Sequence | In the ParseLink Profile Editor |
|
FirstName |
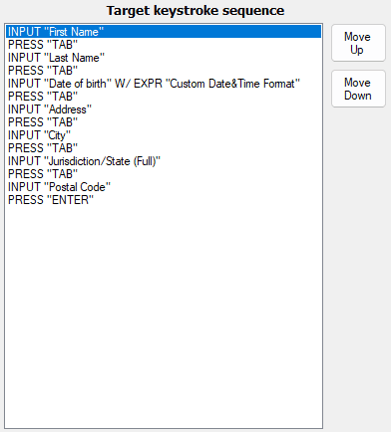 |
Once you have completed a profile, click Save at the bottom. Make sure to select the profile and test it to ensure it works properly before utilizing it.
Choosing a Profile
The profile you select will be used for every scan. To choose this profile right-click on the ParseLink icon to access the menu, navigate to Keyboard Emulation > Profiles, and then choose the profile you want from the list. Any custom profiles will be included here along with the default profiles.
If you wish to select a different profile for each scan, there is a setting for this. Navigate to Keyboard Emulation and then check Select Profile for every scan from the list. Learn more about Profile Auto-Mapping here.