Table of Contents
What is Profile Auto-Mapping?
Profile Auto Mapping allows individual ParseLink profiles to be assigned to specific windows open on your PC without needing to choose a profile every scan. A default profile is also selected which will be used if none of the specified windows are present.
For example, one profile could be for filling out an excel sheet while another could be for filling out a webform. ParseLink will detect if the excel sheet or the webform is currently the main selected window, and then the properly assigned profile will be used instead of the default profile.
This setting should be used as an alternative to the "Select Profile for every scan" setting. If "Select Profile for every scan" is enabled, it will override any auto mapping configuration.
Profiles Mapping Manager
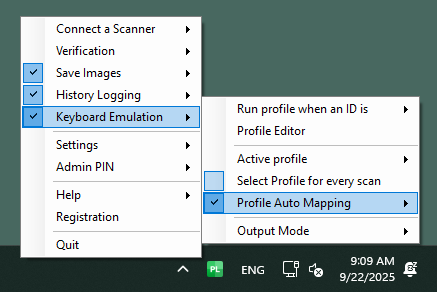
To configure profile auto mapping, access the Profiles Mapping Manager by right-clicking the ParseLink tray icon to access the main menu.
Navigate to Keyboard Emulation > Profile Auto Mapping > Profiles Mapping Manager.
Once the profile mapping is configured, make sure to check the box next to Profile Auto Mapping to enable this feature.
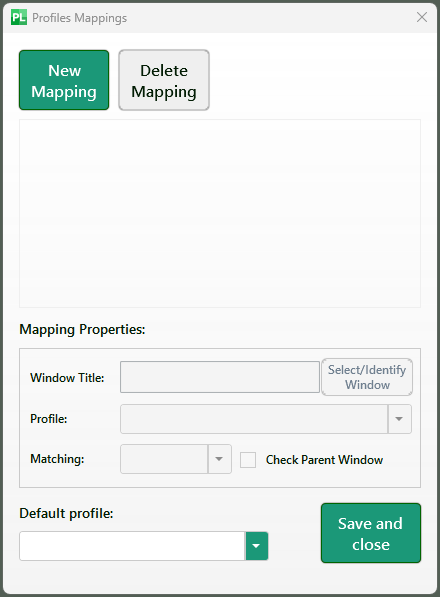
Mapping a Profile
Begin by clicking New Mapping to create a new Profile Map.

First assign the Window Title of the application you want to trigger the profile.
![]()
This can easily be done by clicking the "Select/Identify Window" button. Place your mouse cursor over the window you wish the data to be populated into, and then click on that window.
Note: changing the name of a saved document will change the window name.
Next select the Profile that ParseLink will use while the specified window is active.
![]()
Note: The window must be active; it cannot be minimized or behind any other window.
Finally choose how exact ParseLink will match the specified title.
![]()
- Contains will use the profile if the active window contains the specified title. If the title is "Chrome," then a Chrome Legacy Window, as well as, a word document titled Document Chrome will both use the profile.
- StartsWith will search for a window title starting with the specified title. If the title is "Chrome," then a Chrome Legacy Window will use the profile, but a document titled Document Chrome would not - it does not start with "Chrome."
- Equals will only use the profile if the title specified matches the window title exactly. Neither of the above examples would use the profile.
Check Parent Window will search for the Window Title within the Parent window.
![]()
If your webform or application opens a secondary window, the profile will still search for the originating window's title.
Except for the main application window, each floating window has a parent window. The parent of a window is typically the current window at the time the new window is created.
Selecting a Default Profile will provide a fallback in case no window is found.
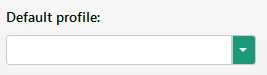
After confguring the Mapping Properties, make sure to select a default profile which will be used if there is no Window Title that matches a mapped profile.
Finally, click Save and close.

If you require any assistance with this setup, please start a ticket.