Account admins can select most settings in the VeriScan Cloud portal, but there are additional ways to tweak how your scan results appear right in VeriScan for Windows.
Select a view
There are four views available:
| What's visible | 1. Detailed Scan Results (default view) |
2. Age-Restricted Compact | 3. Minimal Personal Data | 4. Compact View |
| Verification decision | ✅ | ✅ | ✅ | ✅ |
| Name | ✅ | ✅ | ✅ | ❌ |
| Address | ✅ | ❌ | ❌ | ❌ |
| Country | ✅ | ❌ | ❌ | ❌ |
| Age and validity | ✅ | ✅ | ❌ | ✅ |
| Date of birth | ✅ | ❌ | ❌ | ❌ |
| ID expiration date | ✅ | ❌ | ❌ | ❌ |
| Tags | ✅ | ❌ | ❌ | ❌ |
| Total visit count | ✅ | ✅ | ❌ | ✅ |
| Scan time | ✅ | ✅ | ❌ | ❌ |
| Previous scan date/time | ✅ | ✅ | ❌ | ❌ |
| Group (e.g. Banned or VIP) |
✅ | ✅ | ✅ | ❌ |
| Group comments | ✅ | ❌ | ❌ | ❌ |
| Phone number | ✅ | ❌ | ❌ | ❌ |
| ✅ | ❌ | ❌ | ❌ | |
| Visit comments | ✅ | ❌ | ❌ | ❌ |
| Alerts | ✅ | ✅ | ✅ | ❌ |
Compact View is only available by pressing CTRL+T on your keyboard. The same key combination will exit the view.
Any of these views (excluding Compact View) offer the further flexibility to toggle on or off:
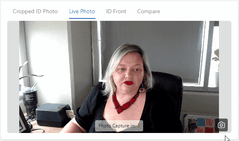
- Photos - you can choose to show or hide photos entirely here. On the scan results screen, you can further select to show cropped ID photo, profile photos, ID front, live photo, or some comparison. These options are limited by the types of scanners and cameras you add in Devices.
- Recent Visitors - the most recent visitors to be scanned will be listed at the bottom of the scan results screen when this is turned on. When this is turned on, you can click Configure Columns to choose how many visitors to show here (maximum of 50, minimum of 1), choose which columns you want to appear in this table, and click and drag to re-order them.
Display scan results
You can choose here whether your scan results remain on the screen until your next scan or if they are cleared after a specified time period (maximum of 59 minutes, minimum of 4 seconds).
Once scan results are cleared by timer, the screen will revert to Ready to Scan.
In/Out tracking
This feature is coming soon to VeriScan for Windows! It will allow you to scan visitors as they enter and exit your establishment so that you can keep an accurate count and roster of who is on premises at any given time. It is most effective when all entrances and exits are staffed with a scanning device.
Age results
Many of you need to restrict who is permitted to enter based on a minimum age. You can set the minimum age that is okay to enter in the VeriScan Cloud portal under Settings > Local Settings > Alerts. That selection is mirrored in VeriScan for Windows.
Camera options
VeriScan for Windows offers the option to capture a live photo of your visitor using a webcam. You can choose how to capture this:
- ✅ Capture live photo automatically allows you to set a countdown of 3-15 seconds before a photo is captured. You can also re-capture later manually.
- If you uncheck this option, you can manually capture with the click of a button.
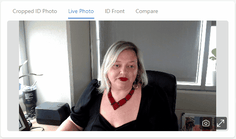
Image reader options
If you have added in Devices a scanner that can take images aka an image reader, and/or a webcam, you will have additional options.
If Preview ID images for each scan is turned on, you will see a full preview of all images taken by your scanner upon each scan. If it is off, you will see the Overview tab of scan results upon each scan, but you can always swap to the Images tab to view and enlarge the images if needed. 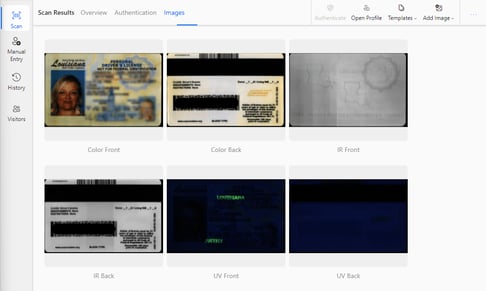
In this section, you can also choose the source for the profile photo shown in the VeriScan Cloud portal and when the same visitor's ID is scanned by other VeriScan apps:
- Cropped ID photo (available if using a scanner capable of taking photos)
- Live photo (available if using a webcam)
- ID front (available if using a scanner capable of taking photos)
- Do Not Assign (selected by default if using a scanner not capable of taking photos and not using a webcam)
Please note that the availability of these options is controlled by the data you choose to collect in VeriScan Cloud portal in Settings > Local Settings > Data.