TABLE OF CONTENTS
Understanding The Issue
Windows 10 includes a feature that automatically puts USB devices in a very low-power state when they're not actively in use. It can help prolong battery life on your laptop or tablet, but it may also cause problems with certain peripherals connected to your PC.
If a USB scanner isn't working correctly after sitting idle for an extended period of time, you can try to disable selective suspend on Windows 10. This may cause your computer to draw more power, but it may help to identify and fix the problem as well. This can prevent you from needing to unplug your scanner, restart the software, or power cycle your PC.
IMPORTANT: It's only recommended that you disable USB Selective Suspend if you're having issues with your scanner not reconnecting after sitting idle for an extended period of time.
How to Disable USB Selective Suspend
Disabling for All Devices
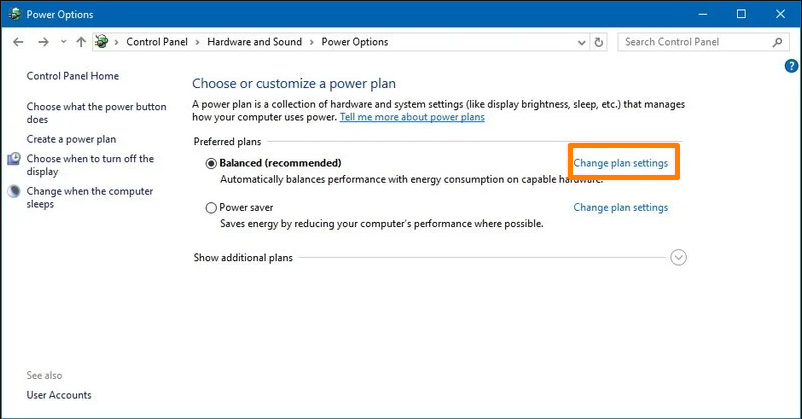
- Open the Windows Control Panel.
- Navigate to Hardware and Sound > Power Options.
- Under "Preferred plans," click the Change plan settings link for the plan you're currently using.
(If you change the settings on the power plan that isn't active, this won't work.)
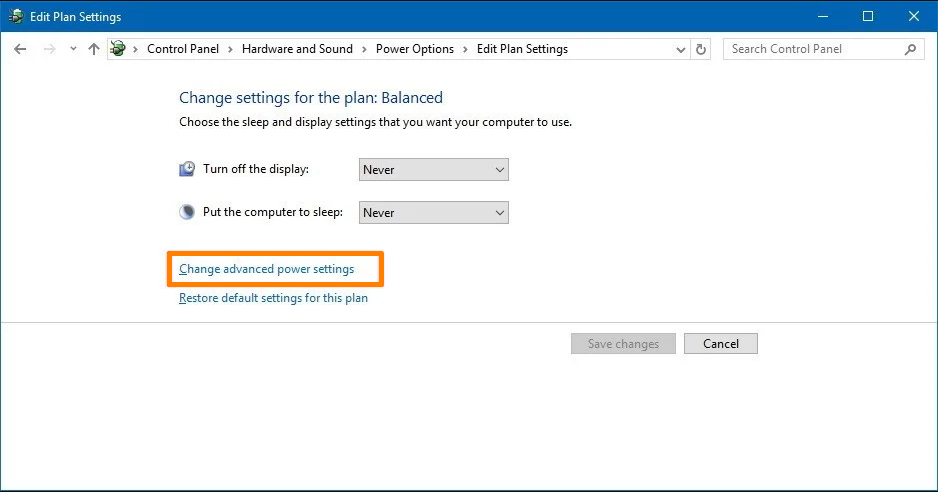
- Click Change advanced power settings.
- Expand USB settings > USB selective suspend setting
- Select Disabled from the drop-down menu.
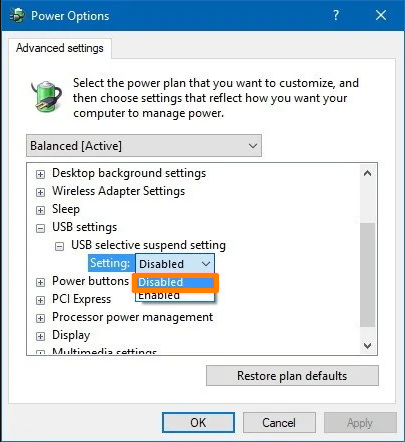
- Click Apply to save your changes.
- Click OK to close the window.