Table of Contents
Scan Screen
|
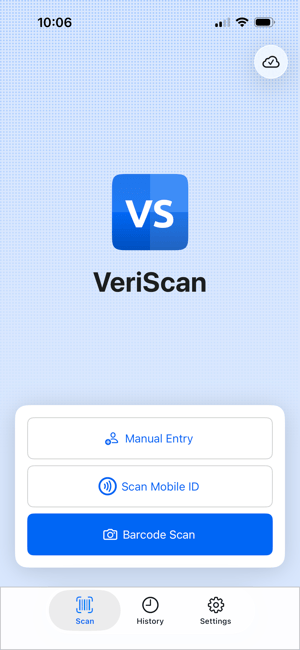
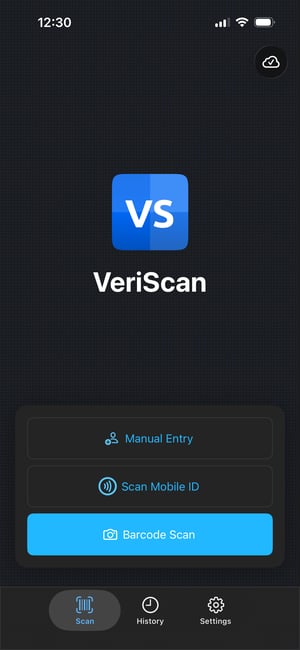
After signing in, launching the VeriScan app will bring you to this screen. 1. Online Status Indicator This cloud icon shows a ✓ when you're connected to the internet and your scans are syning to the VeriScan Cloud Portal. If you're not connected, or you're scanning offline, there will be an × in the cloud icon instead. Tapping this icon will manually switch you between online and offline modes and can be used to force resync your cloud setting. 2. ID Scanning Tapping these buttons allow you to capture your visitor's data and log them in your VeriScan Cloud history.
3. Navigation Bar Tapping these icons allows you to quickly switch between the scan screen, the history screen, and the settings screens. |
 |
Scan Details
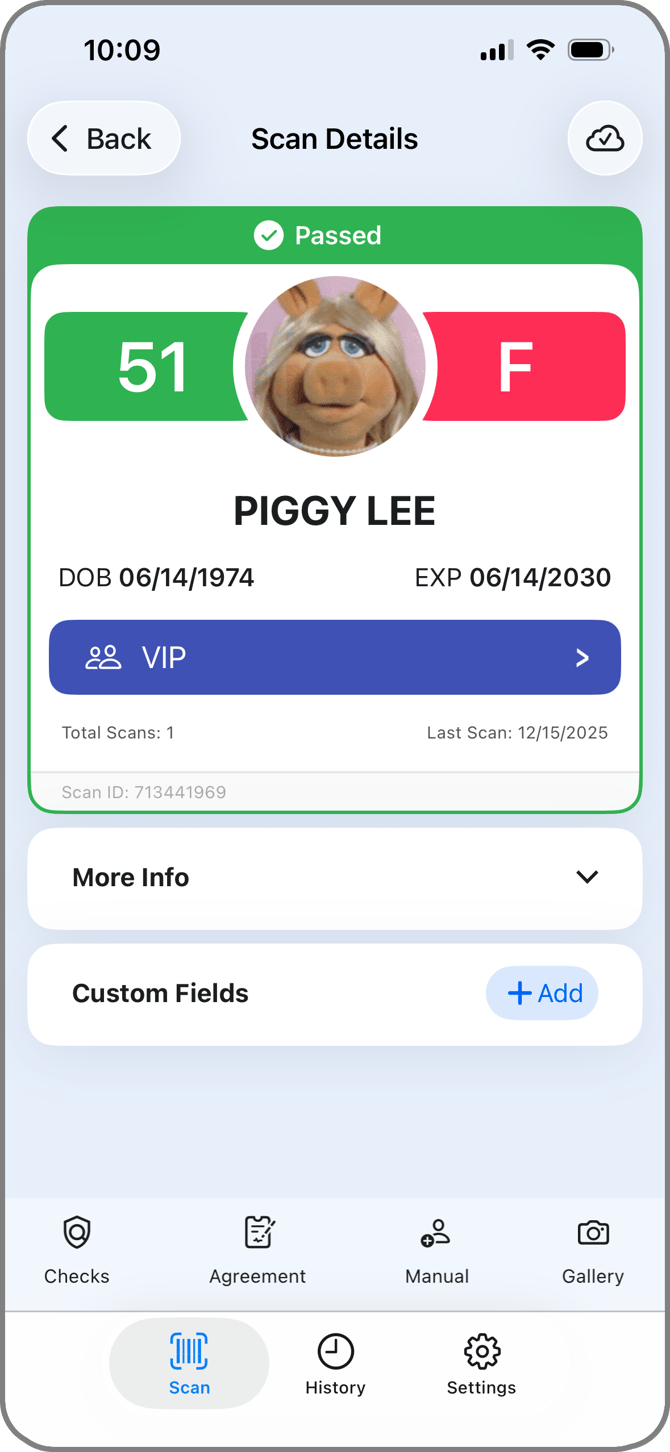
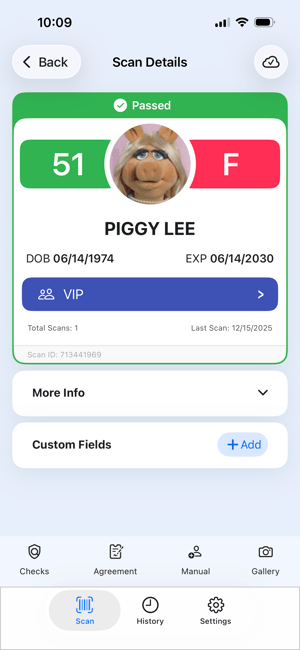
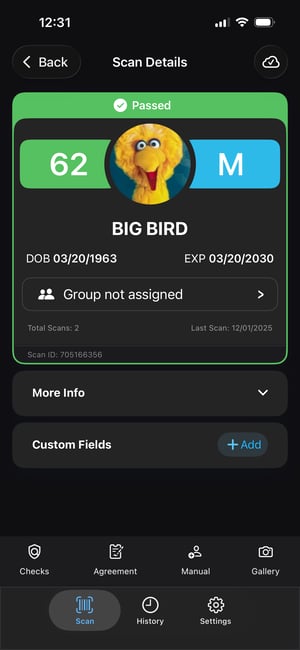
When you scan an ID, you will see the ID's details in the Scan Details screen. This screen appears automatically after a scan and shows the most important information at a glance.
Main Scan Details
|
At the top of the ID Details, you'll see a status bar with the overall result of the scan. In the example in the left, you can see the green Passed status. This ID passed because no issues were found with the ID.
|
 |
|
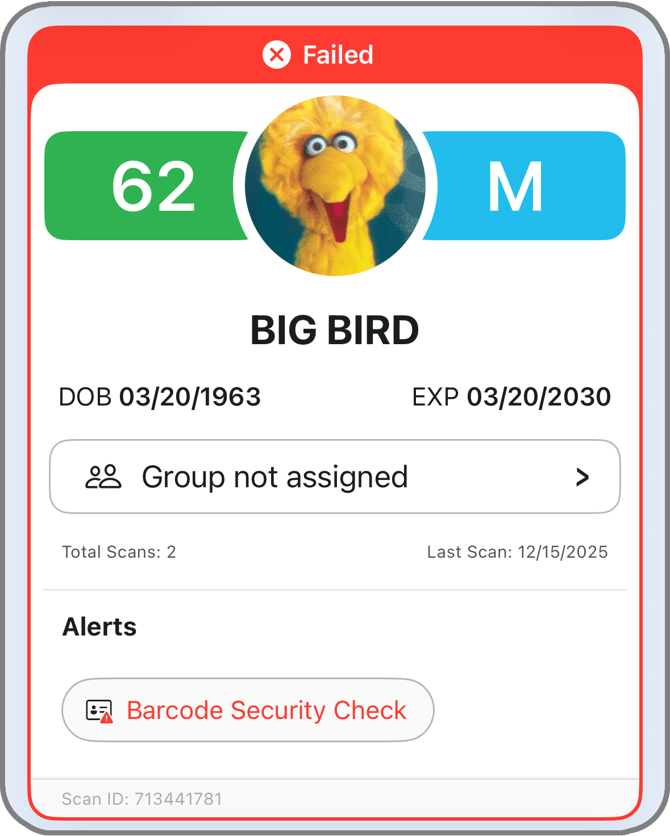
An ID is considered Failed if the ID does not pass one or more of:
In the example on the right, you can see the status bar is red. In the alerts section below, you can see this is because the ID failed the Barcode Security Check. Any other alerts will appear in the alerts section as well, as configured in the VeriScan Cloud Portal.
|
 |
More Info
|
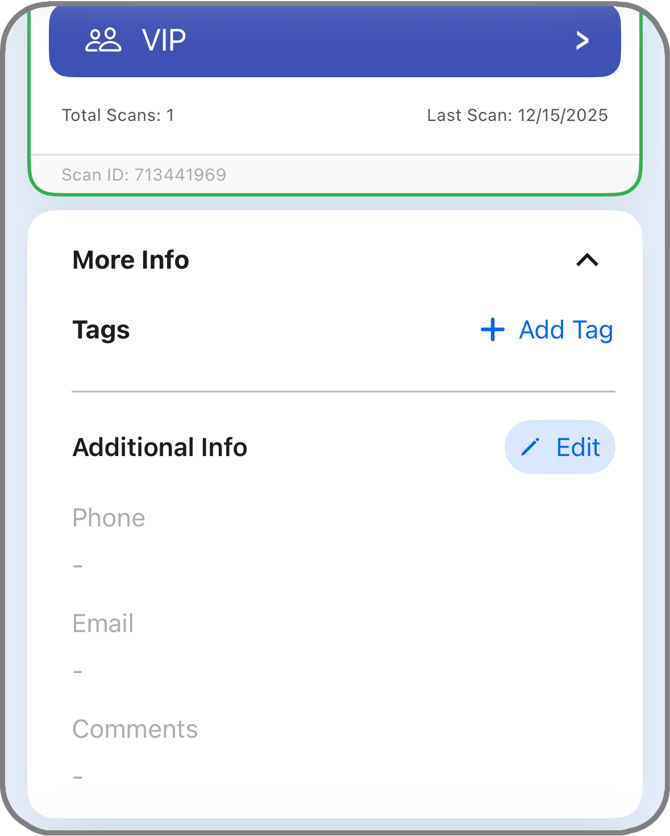
Tapping the arrow to expand this section shows additional information such as address, phone number, email address, and any applied tags.
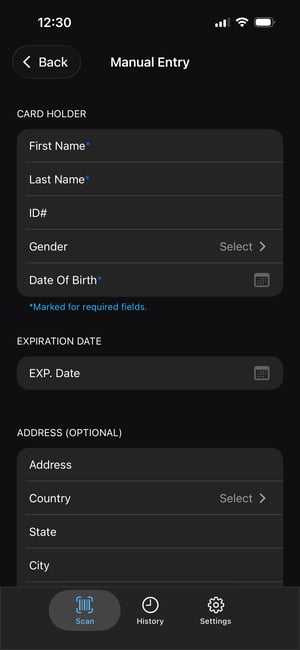
Tap the Add Tag button to open the tags menu and apply one or more of your configured tags. Tags are searchable and, unlike groups, you can assign as many tags as you want to a particular visit or visitor. Tap the Edit button in the Additional Info section to add even more data from your visitor. If they provide a phone number or email address, you can enter it into this menu to store it for later and tie it to their visitor profile. Comments can also be entered here, in case you want to track any information about your visitor that's not in one of the pre-named fields. |
 |

Custom Fields
|
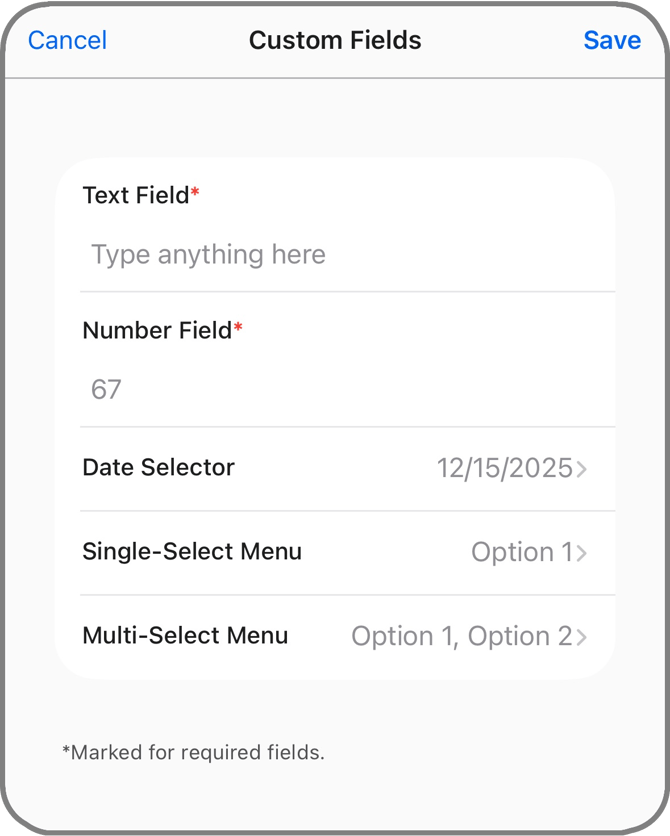
Tap the Add button to add information to the custom fields you have configured in the VeriScan portal. Any custom fields created in the portal will appear in a popup on the screen and can be added to the visit.
You can configure any of the following types:
Any custom field can be marked required, meaning you cannot click the Save button without inputting something into a required field with a red asterisk. |
 |

Agreements
|
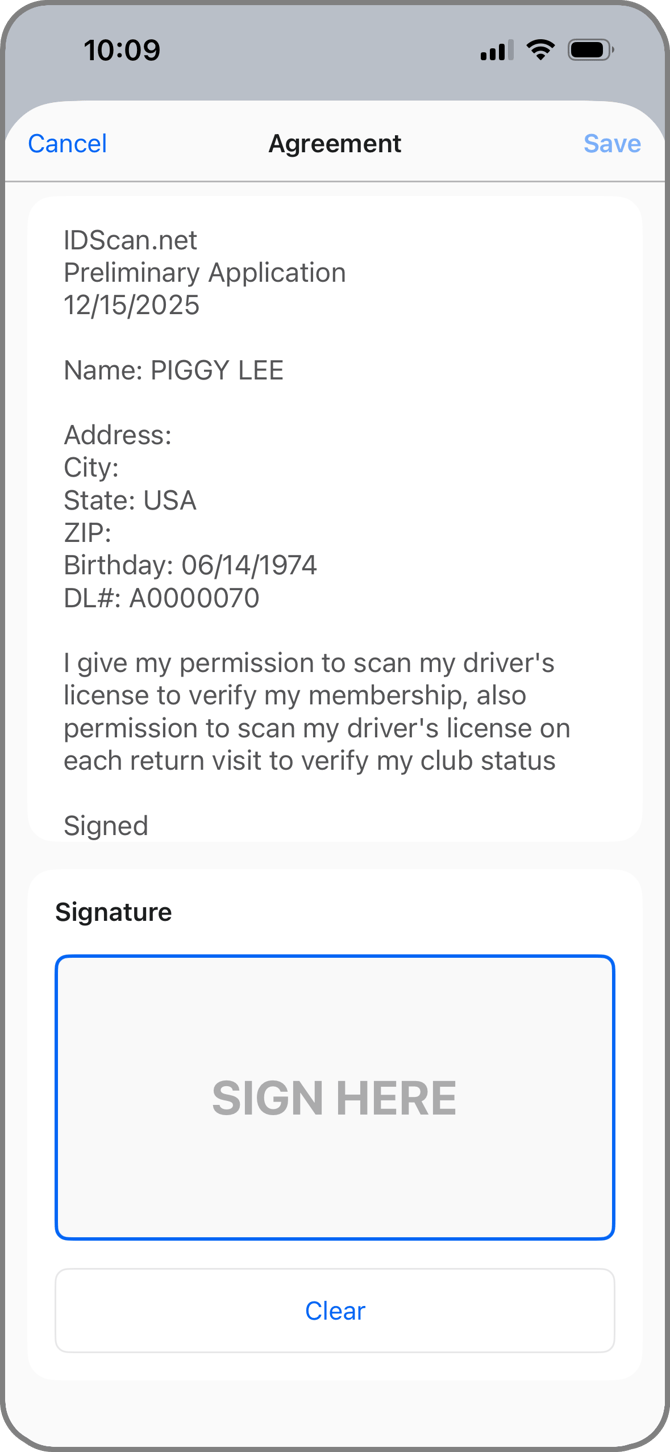
Tap the agreements button in the bottom of the scan details to open the agreement screen.
Agreements are configurable in the VeriScan portal and can be pre-populated with data captured by the scan. In the example on the right, you can see the scan date, name of the signer, address information (if listed), birthday, and driver's license number. You can add any additional hard coded text to the agreement that your visitor can scroll through, read, and sign. Tapping the Sign Here button opens a full screen signature capture screen where your visitor can sign with their finger. The agreement will be saved to the visitor's profile in the VeriScan portal and the signature and body of the agreement cannot be changed once signed. Any changes to the agreement require scanning the visitor's ID and tapping the Agreement button again so they can reread and resign the agreement. |
 |

Gallery
|
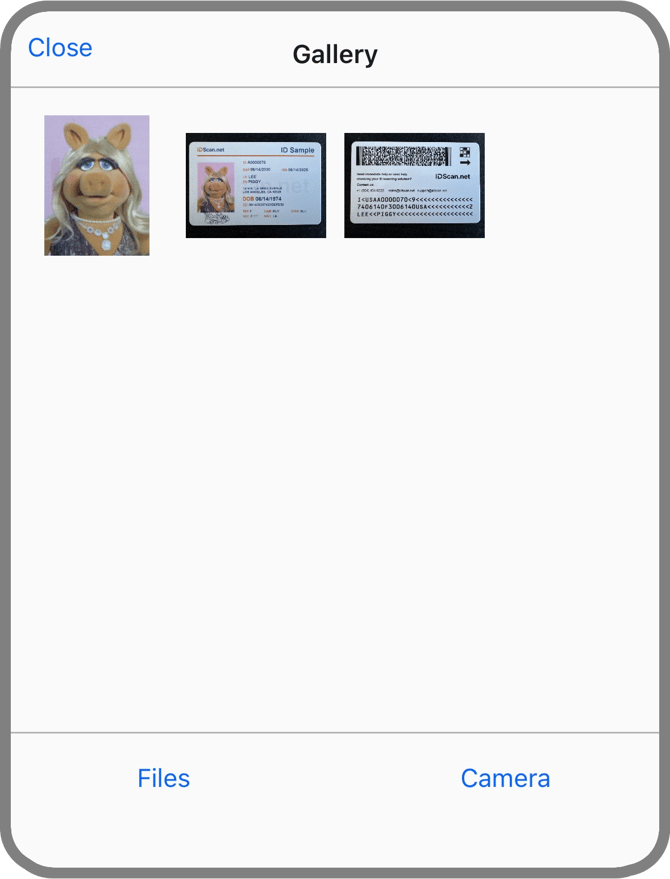
Tap the gallery button in the bottom of the scan details to open the photo gallery screen to manage images.
Here, you can attach any number of images to the visit record. Tap the files button to load an image from the local device's storage or tap on the camera button to use the built-in camera to take a new picture. Tapping an image allows you to view it full screen. You can also delete the images from the full screen view. Tap the close button to exit the gallery once the images are added. |
 |

History
|
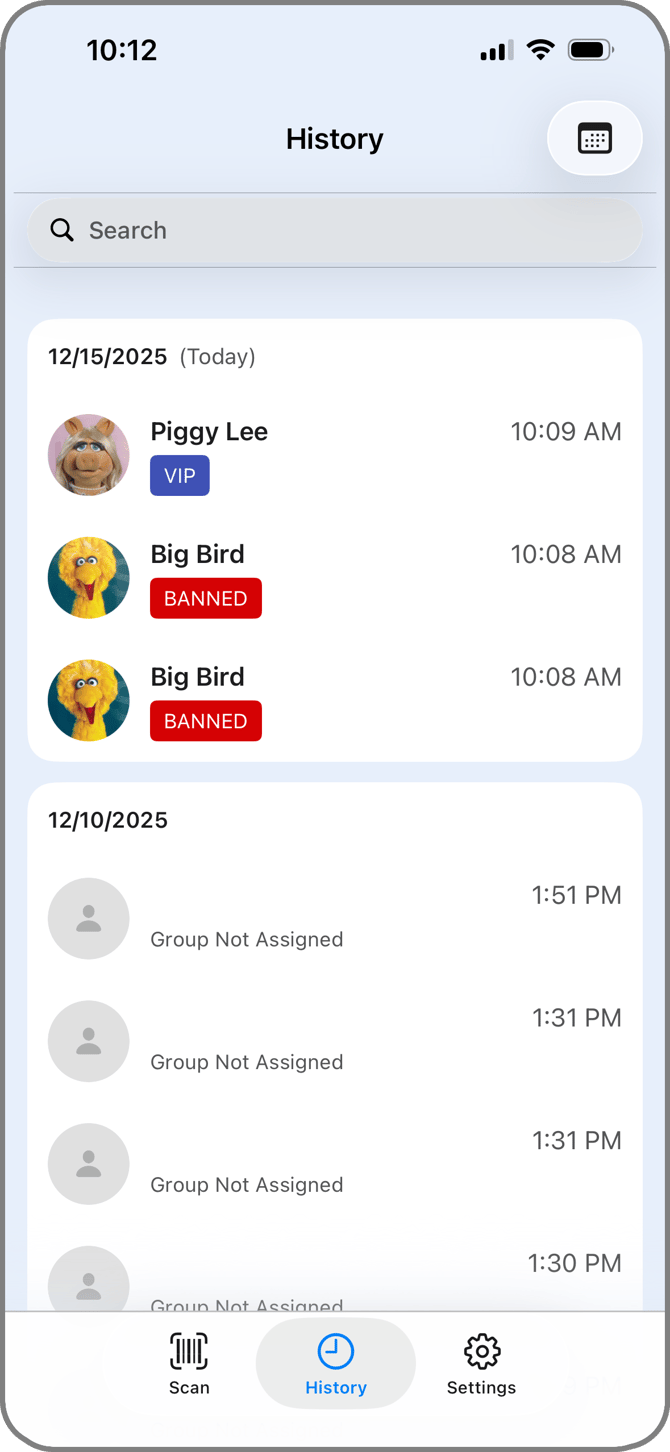
Tap the History icon in the navigation bar to open the recent history of scans on your account. This history menu acts as a quick reference for recent visitor and can be customized in the portal to show scans from just this device or all devices at your location. For more comprehensive filtering, log into the VeriScan Cloud portal to view your history. Date SelectorThe Calendar icon in the top right of the screen opens the date selector menu. You can select the start and end date to filter which history entries are shown in the list. SearchUse the search bar to search through the history entries for a visitor by name. Note that if a visit happened outside of the selected date range, it will not appear in the list even if you search for it. History EntriesHistory entries will appear in the list with key information. If a visitor is scanned via barcode or manual entry, you can see:
If a visitor is scanned via mobile ID, a blank entry will appear with only a timestamp. This is because Apple prohibits the collection of PII when using their mobile ID verification system. |
 |
Dark Mode
VeriScan for iOS now has a built-in dark mode tied to your phone's system settings.
| Light Mode | Dark Mode |
 |
 |
 |
 |
 |
 |